Blogs

When to Remodel a Bathroom: 8 Clear Signs

When to Remodel a Bathroom: 8 Clear Signs

A bathroom rarely fails all at once. More often, the warning signs build slowly: a shower that never feels clean, a vanity with swollen cabinet doors, a floor that stays soft near the toilet, or a layout that makes busy mornings harder than they need to be. Knowing when to remodel a bathroom helps you address real problems before they become expensive repairs – and gives you time to make thoughtful choices rather than rushed ones.

For homeowners across Richmond, Henrico, Hanover, Mechanicsville, Ashland, and Glen Allen, the right timing depends on the condition of the room, the needs of the household, and the goals for the home. A bathroom remodel can be about updating a dated look, but it can also improve safety, storage, comfort, and long-term property value.

When to Remodel Bathroom Spaces Instead of Repairing Them

A simple repair makes sense when the issue is isolated. Replacing a faucet, regrouting a small area of tile, or installing a new light fixture can give a functional bathroom a welcome refresh. Remodeling becomes the smarter investment when several issues appear at the same time or when a repair would only cover up a deeper concern.

1. Water damage keeps returning

Water is the most urgent reason to take a closer look at a bathroom. Peeling paint, stained ceilings below the bathroom, loose flooring, a persistent musty odor, or soft spots around the tub or toilet can point to a leak or moisture problem behind finished surfaces.

Not every stain means a full renovation is necessary. Still, recurring moisture deserves prompt attention. Left alone, it can damage subfloors, framing, drywall, and insulation. If walls or flooring must be opened to correct the problem, that may be the practical moment to improve the layout, finishes, and fixtures rather than restoring an outdated room exactly as it was.

2. The layout works against your daily routine

A bathroom should make mornings and evenings easier. If two people cannot comfortably get ready at once, the door blocks the vanity, there is nowhere to set down toiletries, or the toilet feels cramped, the problem is more than cosmetic.

Layout changes require more planning than a surface update because moving plumbing, electrical connections, or walls can affect the budget. But a well-planned redesign can make a modest-size bathroom feel significantly more useful. In many Richmond-area homes, replacing an oversized tub with a properly designed shower or adding storage around the vanity can improve everyday function without expanding the room.

3. Your bathroom no longer supports safe movement

Safety needs can change quickly after an injury, as parents age, or when homeowners plan to remain in their homes long term. A high tub wall, slippery flooring, narrow doorway, poor lighting, or low toilet can turn a routine space into a daily concern.

An accessibility-focused remodel does not have to look institutional. Curbless or low-threshold showers, secure grab bars installed with proper backing, comfort-height toilets, wider clearances, handheld shower fixtures, and well-placed lighting can create a polished bathroom that is safer and easier to use. Planning these features before they are urgently needed gives homeowners more freedom to choose a design they genuinely enjoy.

4. Mold, mildew, and poor ventilation are constant problems

A little condensation after a hot shower is normal. Mold that returns after cleaning, paint that bubbles, or towels that never seem to dry are not. These signs may mean the exhaust fan is undersized, improperly vented, or simply not moving enough air for the room.

A remodel is a good opportunity to correct ventilation at the source. It may also involve selecting moisture-resistant materials, improving lighting, and addressing hidden areas where water has been collecting. Attractive tile and a new vanity will not solve a humidity problem on their own, so this is one area where proper investigation matters.

5. The finishes are worn beyond a simple update

Some bathrooms are dated but perfectly serviceable. Others have cracked tile, deteriorating grout, rusted fixtures, chipped tubs, damaged laminate, and cabinets that no longer close correctly. When several surfaces have reached the end of their useful life, piecemeal replacements can start to look mismatched and cost more over time.

A full remodel lets you make materials work together. That does not mean every choice needs to be high-end. Durable flooring, a practical vanity, reliable plumbing fixtures, and easy-to-clean shower surfaces often deliver more lasting value than chasing the most elaborate finishes in a showroom.

6. Storage is creating daily clutter

If countertop items spill into the bedroom, towels live in a hallway closet, or cleaning supplies are squeezed around plumbing pipes, your bathroom may not be serving the people who use it. Storage is one of the most common reasons a newly remodeled bathroom feels better immediately.

The best solution depends on the room. A deeper vanity, drawers instead of lower cabinets, a recessed medicine cabinet, a linen tower, shower niches, or built-in shelving can all make a difference. During planning, think about what needs a home in the room, not just what will look good on installation day.

7. You are preparing to sell – or planning to stay

A bathroom remodel can support resale value, especially when the existing space is visibly dated or has obvious damage. Buyers notice bathrooms because repairs and renovations feel expensive and disruptive. A clean, functional, well-finished space can help a home show with greater confidence.

However, resale is not the only reason to remodel. If you expect to stay in your home for years, prioritize your household’s needs over broad trends. Neutral, durable selections tend to appeal to future buyers, but your shower configuration, storage needs, and accessibility features should first serve the way you live now.

8. You are already planning another home project

Bathroom work can be easier to coordinate when it is part of a larger renovation. If you are updating an addition, finishing nearby space, improving a primary suite, or making accessibility upgrades elsewhere in the home, there may be advantages to planning the bathroom at the same time.

This is not always the least expensive path, since a larger scope requires a larger investment. It can, however, reduce repeated disruption and help ensure that flooring, trim, electrical work, and design decisions feel connected throughout the home.

Choosing the Best Time of Year for a Bathroom Remodel

Unlike deck work or exterior painting, bathroom remodeling can happen in any season. The better question is whether the timing works for your family. Consider holidays, travel, school schedules, guests, and how many bathrooms are available in the house.

A hall bathroom used by children may be easier to renovate while the family is away for a few days or during a quieter stretch of the school year. A primary bathroom renovation may require a temporary routine in another bathroom. A dependable contractor should discuss that reality early, including where crews will enter, how the work area will be protected, and what parts of the room will be unavailable at each stage.

Planning ahead is especially helpful if you have a preferred completion date. Design decisions, material availability, permits when required, and the condition found after demolition can all affect the schedule. Starting the conversation before the bathroom becomes an emergency gives you more control over the process.

Plan the Remodel Around Priorities, Not Just Pictures

Before selecting tile or paint colors, identify the outcomes that matter most. For one homeowner, the priority may be a safer shower for an aging parent. For another, it may be ending the morning bottleneck with a double vanity. A third may need to repair water damage without stretching the budget unnecessarily.

Bring those priorities to the consultation, along with a realistic investment range. Honest budget conversations help determine where to spend more and where to simplify. For example, keeping plumbing in its current location may preserve funds for better shower construction, cabinetry, ventilation, or lighting. Moving fixtures can be worthwhile when the layout is genuinely poor, but it should be a deliberate choice rather than an assumption.

It also helps to expect a few unknowns in older homes. Once finishes are removed, a contractor may find damaged framing, outdated plumbing, or electrical work that needs correction. Careful planning cannot eliminate every surprise, but experienced project management and clear communication can keep decisions understandable and prevent small issues from becoming major frustrations.

A Bathroom Remodel Should Make Home Feel Easier

The best time to begin is usually before a minor inconvenience becomes water damage, a safety risk, or a rushed decision. Start with a clear look at what is not working, what your family needs next, and what would make the room easier to live with every day.

Old Dominion Innovations helps Richmond-area homeowners turn those needs into practical bathroom renovation plans with attentive communication, skilled workmanship, and respect for the home throughout the project. A thoughtful consultation can replace uncertainty with a clear path forward – and give you a bathroom that feels dependable long after the work is complete.

8 Small Deck Makeover Examples for Richmond Homes

8 Small Deck Makeover Examples for Richmond Homes

A small deck can be one of the most useful spaces around your home, but only if it works for the way you actually live. The best small deck makeover examples do not try to squeeze in everything. They solve a clear problem: an unsafe surface, a cramped seating area, a lack of shade, difficult access, or an outdoor space that simply feels forgotten.

For homeowners around Richmond, a thoughtful deck update can turn a modest landing or backyard platform into a comfortable place for morning coffee, family meals, and quiet evenings outside. The right scope depends on the deck’s condition, your budget, and whether the structure can safely support the features you want to add.

What Makes a Small Deck Makeover Successful?

Small decks reward careful planning. On a large deck, an oversized table or extra planter may go unnoticed. On a compact deck, every inch affects circulation, comfort, and safety. Before choosing colors or furniture, look at the fundamentals: framing, footings, stairs, railings, drainage, and the connection where the deck meets the house.

A fresh surface will not correct loose railings, deteriorated joists, or stairs with uneven risers. If the structure is sound, cosmetic updates may be enough. If it is not, replacing damaged components first protects both your investment and the people using the space.

The examples below show how small changes can create a major improvement without making a deck feel crowded.

8 Small Deck Makeover Examples That Feel Bigger

1. Replace worn boards with low-maintenance composite decking

A small deck with splintered, stained, or repeatedly peeling wood can make the entire backyard feel dated. Replacing the walking surface with composite decking gives the space a cleaner, more finished appearance and reduces the regular sanding and staining that natural wood often requires.

Composite is a practical choice for busy households, but it costs more upfront than many pressure-treated wood options. Color and heat retention can also vary by product. For a deck that gets strong afternoon sun, selecting a lighter tone may make bare feet more comfortable in summer.

2. Update railings for a cleaner view

Bulky, weathered wood railings can visually close in a small deck. Slimmer rail profiles, black metal balusters, or cable-style systems where appropriate can open the sightline to the yard and make the deck feel less confined.

Safety comes first. Railing height, spacing, and attachment details must meet applicable building requirements. This is not the place for a quick cosmetic fix if posts are loose or the existing guard system is undersized. A properly installed railing should feel solid every time someone leans against it.

3. Build a compact bench instead of adding more chairs

Loose patio furniture consumes valuable floor space. A built-in bench along one edge of a small deck creates dependable seating while leaving the center open for movement. Add weather-resistant cushions and a few pillows, and the deck becomes a usable outdoor room rather than a narrow passageway.

Storage benches can be helpful for cushions and outdoor accessories, though they require careful construction to keep moisture out. If storage is not needed, an open-base bench is often easier to maintain and allows air to move beneath it.

4. Add a pergola or partial shade structure

A deck can be structurally sound and still go unused because it is too hot in the middle of the day. A pergola, roof extension, or partial shade structure helps define the area and provides relief from direct sunlight without completely blocking natural light inside the home.

The best choice depends on the deck location. A pergola offers filtered shade and an airy look, while a covered structure provides stronger protection from rain. A roofed addition may involve more design, permitting, and structural work, but it can dramatically extend the seasons when your family uses the deck.

5. Improve access with wider, safer stairs

Narrow stairs, missing handrails, and worn treads are common issues on older decks. Rebuilding the stair run with consistent steps, a secure handrail, and adequate lighting makes the deck easier to use for children, guests, and aging family members.

A wider bottom step can also serve as a transition point between the deck and yard. In a small space, this kind of improvement does double duty: it looks intentional while making everyday movement safer. Accessibility needs may call for additional features, so it is worth discussing how the deck will serve your household now and in the future.

6. Use lighting to create a finished evening space

Thoughtful lighting changes how a small deck feels after sunset. Step lights, post-cap lights, under-rail lighting, and warm wall-mounted fixtures can make the deck safer without turning it into a floodlit patio.

The goal is layered light, not brightness everywhere. Stairs and changes in elevation need the most attention. A soft fixture near the door can support grilling, serving food, or letting the dog out, while subtle rail lighting adds atmosphere for relaxed evenings outside.

7. Create privacy with a screened edge or planter wall

Many Richmond-area homes have close backyard sightlines. If the deck faces a neighboring patio, driveway, or second-story window, a partial privacy screen can make the space feel far more comfortable. Horizontal slats, lattice panels, or an integrated planter wall can block a specific view without enclosing the entire deck.

Avoid building a tall, solid wall without considering wind, drainage, and local requirements. A screen should be designed as part of the deck, not treated like an afterthought attached to an aging railing. For some homes, well-placed landscaping offers a softer solution and preserves more light.

8. Turn an unused landing into a purposeful outdoor entry

Not every deck needs to become an entertainment zone. A small rear or side landing may work best as a polished outdoor entry, with a durable surface, secure railings, adequate lighting, and enough room to safely open the door and carry groceries inside.

This makeover is especially valuable when the existing landing feels unstable or awkward. A simple redesign can improve curb appeal from the backyard, create a safer route into the home, and eliminate the clutter that tends to collect near a door. Sometimes the most successful improvement is making a necessary space work reliably every day.

Plan the Layout Before Selecting Finishes

Start by identifying the deck’s primary job. If it is for dining, measure the table and allow space to pull out chairs. If it is for grilling, maintain a safe, comfortable path between the door, grill, and seating area. If it is mainly an entry point, prioritize clear walking space over decorative accessories.

Scale matters more than quantity. One appropriately sized loveseat, a small bistro table, and a narrow side table may be more useful than a full patio set. Built-in features can save space, but they are permanent, so they should reflect how you expect to use the deck for years rather than one season.

Know When a Makeover Should Become a Renovation

Painting, staining, new furniture, and lighting can refresh a deck that is structurally sound. They should not be used to disguise rot, movement, or deterioration. Watch for soft boards, visible cracks at critical connections, loose posts, rusted hardware, water pooling near the house, or stairs that shift underfoot.

A professional evaluation can clarify whether you need surface repairs, partial rebuilding, or a full deck renovation. It also helps prevent a frustrating situation where new finishes must be removed later to correct hidden structural problems. Old Dominion Innovations approaches this kind of work with a practical focus: protect the home, communicate clearly, and recommend a solution that fits the condition of the deck and the homeowner’s plans.

Your small deck does not need to be expansive to become a favorite part of the home. Start with the issue that limits its use most, whether that is safety, shade, seating, or maintenance, and build the makeover around a space your family will genuinely enjoy using.

Sunroom Installation Cost Breakdown for Richmond

Sunroom Installation Cost Breakdown for Richmond

A sunroom can turn a back patio, unused deck, or dim corner of the house into a favorite place to gather, relax, and enjoy the view. But a reliable sunroom installation cost breakdown has to account for more than the room itself. In the Richmond area, the final investment depends on how the room will be used, what the existing structure can support, and what it takes to make the space comfortable through Virginia’s humid summers and cooler winter days.

For many homeowners, a professionally built sunroom falls somewhere between a modest outdoor enclosure and a full home addition. The difference comes down to insulation, foundation work, heating and cooling, finish selections, and the level of customization your home requires.

Sunroom Installation Cost Breakdown: Typical Price Ranges

A basic three-season sunroom may start around $25,000 to $45,000, while a larger or more customized project can move beyond that range. A fully insulated, four-season sunroom designed for year-round use commonly falls between $50,000 and $100,000 or more. Projects with significant structural work, premium windows, custom rooflines, masonry, or extensive electrical and HVAC upgrades can exceed those figures.

These are planning ranges, not one-size-fits-all quotes. Two sunrooms with the same square footage can have very different prices when one is built on an existing, suitable foundation and the other requires excavation, new footings, utility changes, and a roofline that ties into the home.

The most useful way to look at the budget is by the major parts of the project:

| Project component | Typical planning range | What affects the cost | | — | —: | — | | Site preparation and foundation | $5,000 to $20,000+ | Grading, drainage, footings, slab size, access, and soil conditions | | Framing, roof, and exterior integration | $12,000 to $35,000+ | Roof design, materials, structural connections, and exterior finishes | | Windows, doors, and screens | $8,000 to $30,000+ | Glass performance, opening size, door style, and number of panels | | Electrical, HVAC, and lighting | $3,000 to $15,000+ | Panel capacity, outlets, fans, lighting, and heating/cooling needs | | Interior finishes | $4,000 to $20,000+ | Flooring, trim, drywall, paint, ceiling treatments, and built-ins | | Permits and design work | $1,000 to $5,000+ | Local requirements, engineering, plans, and project complexity |

A detailed consultation should turn broad ranges into a clear scope of work. That means identifying what is included before construction begins, rather than comparing a low initial number against a more complete proposal later.

Start With How You Want to Use the Room

The biggest decision is whether you want a three-season room or a true four-season living space. A three-season sunroom is often ideal for homeowners who want protection from rain, pollen, and insects while enjoying spring, summer, and fall. It may use screened sections, single-pane glass, lighter insulation, and a simpler cooling solution such as a ceiling fan.

A four-season sunroom is built to perform more like the rest of the home. It typically needs insulated walls, energy-efficient windows, a properly insulated roof and floor, and a dependable heating and cooling plan. The up-front cost is higher, but the room can become a breakfast area, family room, reading space, home office, or flexible gathering spot throughout the year.

There is no wrong choice. A three-season room can be a smart investment when the goal is comfortable outdoor living. If you expect to use the space every day in January and August, it is usually wiser to budget for four-season construction from the beginning rather than try to retrofit it later.

Foundation and Structural Work Can Change the Budget Quickly

An existing concrete patio or deck is not automatically ready to support a sunroom. A slab may be too thin, cracked, improperly pitched, or lack the footings required for a permanent enclosed structure. An older deck may need reinforcement or complete replacement before walls, windows, and a roof can be safely added.

This is where a careful site evaluation protects the homeowner. A contractor should look at drainage, elevation, foundation condition, access to the work area, and how the new room will connect to the house. Richmond-area homes can also present practical challenges such as sloped yards, crawlspaces, mature landscaping, and older construction details that need thoughtful planning.

Structural changes can feel less exciting than choosing windows or flooring, but they are the part of the project that keeps the finished room sound, dry, and secure. Spending appropriately on footings, flashing, roofing transitions, and water management helps avoid costly problems after the project is complete.

Windows and Roof Design Drive Comfort as Much as Appearance

A sunroom is largely made of glass, so window quality matters. Lower-cost glass can make a room feel bright, but it may also allow excessive solar heat in summer and make the space harder to warm in winter. Energy-efficient glass, insulated frames, and thoughtfully placed shades can improve comfort and reduce glare without sacrificing the view.

The direction the room faces also matters. A west-facing sunroom receives intense afternoon sun, while a south-facing room can collect significant heat throughout the day. A reputable design process considers roof overhangs, window placement, ventilation, ceiling fans, and the option of solar-control glass before construction starts.

Roof style affects both cost and the finished look. A simple shed roof is often more budget-friendly than a gable, hip, or vaulted design. However, the right choice depends on the home’s existing roofline, ceiling-height goals, and how naturally the addition should blend with the exterior. Matching siding, trim, roofing, and architectural details may add cost, but it often makes the sunroom feel like it was always part of the home.

Utilities and Finishes Should Be Planned Early

Electrical work is essential for a room people will actually use. Most homeowners want outlets for lamps and chargers, overhead lighting, a ceiling fan, and exterior lighting near the entry. Depending on the project, the electrical panel may need available capacity or an upgrade to safely serve the addition.

For a four-season sunroom, heating and cooling deserve equally careful planning. Extending existing ductwork is sometimes possible, but it is not always the best option. The current HVAC system may not have enough capacity, and long duct runs can create uneven temperatures elsewhere in the house. A ductless mini-split can be an effective alternative for many sunrooms because it provides dedicated temperature control without major changes to the home’s central system.

Interior selections also shape the final cost. Durable luxury vinyl plank, tile, or engineered wood may suit a sunroom better than materials that react poorly to changing temperatures or direct sunlight. Drywall, beadboard, trim, painted ceilings, and built-in storage can give the room a finished interior feel. These choices are flexible, but it helps to decide the desired level of finish early so the estimate reflects the room you actually want.

Permits, Inspections, and Honest Allowances Matter

A permitted sunroom project involves more than building walls and setting windows. Local requirements may address zoning setbacks, building codes, structural connections, energy standards, electrical work, and inspections. Homeowners in Richmond, Henrico, Hanover, Mechanicsville, Ashland, and Glen Allen may face different jurisdictional processes depending on where the property is located.

Permits and inspections are not a place to cut corners. They help confirm that the addition is built safely and can also matter when you sell, refinance, or insure the home. Your contractor should explain which approvals are needed, who is responsible for securing them, and whether permit fees are included in the proposal.

It is also wise to ask about allowances. An allowance is a budgeted amount for a selection that has not been finalized, such as flooring, light fixtures, or a door. Allowances are normal, but they should be realistic. A low allowance can make an estimate appear attractive while leaving the homeowner responsible for added costs once actual products are chosen.

How to Keep Your Sunroom Budget Grounded

The best way to manage costs is not to choose the cheapest number. It is to choose a well-defined project. Ask for a scope that explains foundation work, framing, roof integration, windows, doors, insulation, electrical, HVAC, finishes, permits, and cleanup. If one proposal is much lower than another, compare what is included rather than assuming the rooms are equivalent.

You can often control the budget by keeping the footprint efficient, selecting a simpler roofline, limiting custom window configurations, and choosing finishes that fit the rest of the home without overbuilding the space. At the same time, avoid reducing the items that affect weather protection, structural integrity, and year-round comfort. Those are difficult and expensive to correct after the room is finished.

At Old Dominion Innovations, the goal is to help homeowners make decisions with a clear picture of the work, the investment, and the practical trade-offs involved. A sunroom should feel like a welcome extension of your home, not a construction project that leaves you guessing about the final cost.

Before choosing a design, take a moment to picture the room on an ordinary weekday, not just a sunny Saturday. The best plan is the one that fits how your family lives, handles Richmond weather well, and is built with enough care that you can enjoy it for years.

Composite Decking Versus Wood for Your Home

Composite Decking Versus Wood for Your Home

A deck should make it easier to enjoy your home, not create another long weekend of scraping, staining, and worrying about loose boards. For Richmond-area homeowners weighing composite decking versus wood, the better choice usually comes down to how you use the space, how much maintenance you want to take on, and what you expect from the investment over time.

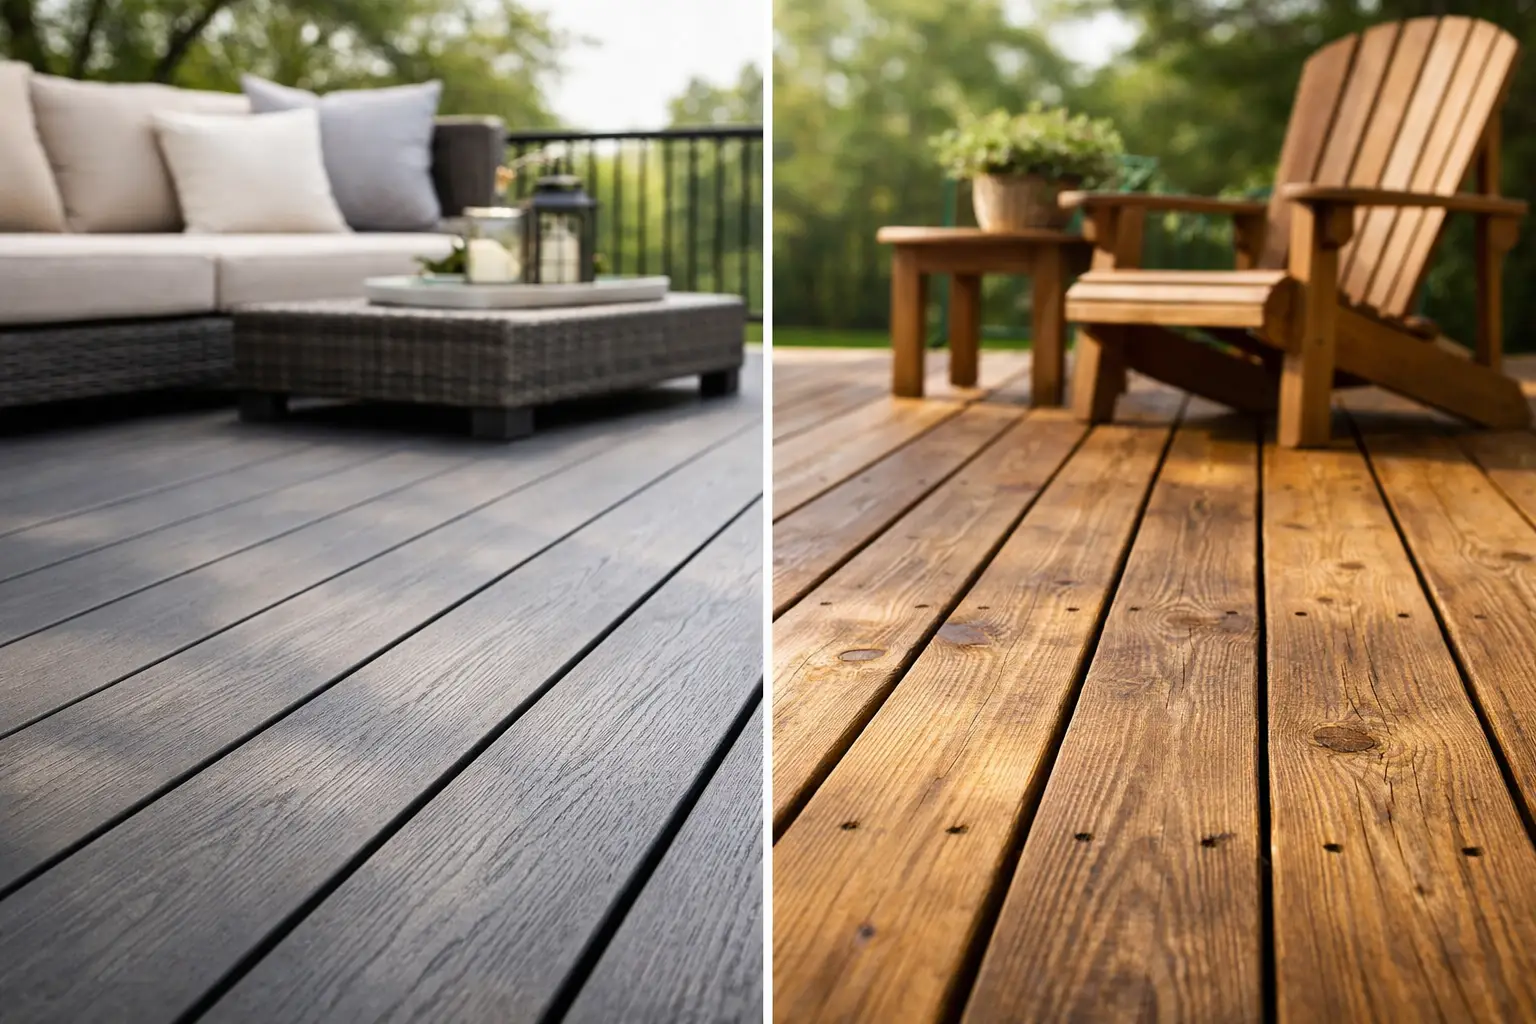
Both materials can create a beautiful outdoor living area. A properly built wood deck has a classic warmth that many homeowners love. Composite decking offers a more uniform finish and a lower-maintenance routine. Neither is automatically right for every home, but the differences become clearer when you look beyond the initial price.

Composite Decking Versus Wood: The Big Differences

Wood and composite decking differ in more than appearance. Their day-to-day care, reaction to Virginia weather, repair needs, and long-term costs can be very different.

Wood decking is typically made from pressure-treated lumber, cedar, or other natural wood species. Pressure-treated pine is a common choice because it is widely available and generally costs less upfront. It can be painted or stained in a broad range of colors, and individual boards are usually straightforward to replace when damage occurs.

Composite decking is made from a blend of recycled wood fibers and plastic materials. Higher-quality boards are often capped with a protective outer layer designed to resist moisture, staining, fading, and surface wear. Composite boards are available in colors and grain patterns that mimic natural wood, though the look is more consistent from board to board.

For a homeowner deciding between the two, the question is not simply which material looks better on installation day. It is which material will still fit the household’s budget, maintenance tolerance, and outdoor routine several years from now.

Upfront Cost and Long-Term Value

Wood generally has the lower initial material cost, especially pressure-treated lumber. That can make it an appealing choice when a deck needs to meet a firm project budget or when the deck is relatively small. Natural wood also gives homeowners flexibility to change the color later with a new stain or paint finish.

The lower starting price does not tell the full story. A wood deck needs periodic cleaning, sealing, staining, or painting to help protect it from moisture and sun exposure. Over time, boards may split, warp, loosen, or develop areas of rot. Those maintenance costs and the time involved can add up.

Composite decking costs more at the outset, but it usually requires less routine work after installation. It does not need to be stained or sealed. Regular cleaning with an appropriate deck cleaner, water, and a soft brush is generally enough to keep it looking presentable. For homeowners who would rather spend Saturday on the deck than maintaining it, that difference has real value.

Long-term value also depends on the condition of the deck structure underneath. In many deck renovation projects, the surface boards are only part of the conversation. The framing, footings, ledger connection, railings, stairs, and drainage all deserve a careful review. Installing premium composite boards over compromised framing is not a good investment, just as replacing a few wood boards will not solve an underlying water or structural issue.

How Richmond Weather Affects Each Material

Central Virginia weather puts every exterior surface to work. Summer heat and humidity, heavy rain, fallen leaves, pollen, freezing temperatures, and occasional snow all affect a deck over the years.

Wood needs consistent protection

Wood absorbs and releases moisture. Without regular protection, that cycle can lead to checking, splintering, cupping, and cracking. Areas that stay shaded or receive limited airflow can hold moisture longer, increasing the risk of mildew and decay. Deck boards near planters, under dense trees, or beside a pool often need closer attention.

Pressure-treated lumber is designed to resist decay and insect damage, but it is not maintenance-free. Keeping the deck clean and applying a quality protective finish on schedule helps preserve its appearance and service life.

Composite resists moisture but still needs planning

Composite decking does not absorb water the way wood does, which is a major advantage in humid and rainy conditions. It is less likely to splinter or rot, and capped products typically resist staining from spills, leaves, and everyday outdoor use better than unprotected wood.

That does not mean composite solves every outdoor maintenance issue. Pollen, dirt, food spills, and mildew can still collect on the surface, particularly in shaded locations. Proper board spacing and ventilation below the deck remain essential. A well-designed deck needs to move water away from the home and allow the framing to dry, regardless of the surface material.

Appearance, Feel, and Everyday Use

Wood has natural variation in grain, knots, and color. That character is difficult to duplicate completely, and it can be the deciding factor for homeowners who want a traditional deck that feels connected to the rest of an older home or wooded yard. A fresh stain can also give wood a rich, tailored appearance.

Composite is a strong choice for homeowners who prefer a polished, consistent finish. Modern boards come in a range of warm browns, weathered grays, and deeper colors, with many options that resemble wood grain. Hidden fastener systems can create a clean surface without rows of visible screw heads.

Comfort matters as well. Some composite boards, especially darker colors in full afternoon sun, can become warmer under bare feet than wood. If your deck faces west, surrounds a pool, or will be used frequently by children and pets, color selection and shade planning deserve attention. A lighter board color, pergola, awning, or strategic shade can make the space more comfortable during Richmond’s hottest months.

Wood can also become hot in direct sun, and neglected boards may produce splinters. The better choice depends on the location of your deck and how your family plans to use it.

Maintenance and Repair Expectations

The maintenance difference is one of the clearest factors in composite decking versus wood.

A wood deck benefits from regular sweeping and washing, along with inspection for damaged boards, protruding fasteners, and soft spots. Depending on exposure and finish type, it may need to be re-stained or sealed every few years. Homeowners who enjoy hands-on projects may see this as a manageable part of owning a wood deck. Others may see it as a recurring obligation they would rather avoid.

Composite requires cleaning but eliminates the regular cycle of sanding and staining. Its color is built into the board, so there is no finish to peel. If a composite board is significantly damaged, repair can be more involved because matching an older color or accessing hidden fasteners may require extra care. Still, its resistance to routine wear is a practical advantage for busy households.

Railings, stairs, lighting, and deck framing need maintenance regardless of the decking material. A safe deck is about the entire system, not just the boards underfoot. Annual inspections can catch loose connections, corroded hardware, settling, and drainage concerns before they become larger repairs.

When Wood Is the Better Choice

Wood may be the right fit when the project budget is the primary concern, when you prefer the authentic appearance of natural lumber, or when you are comfortable maintaining the deck over time. It can also be a sensible choice for a smaller platform deck, a screened area with less direct weather exposure, or a project where matching existing wood features matters.

Choose quality materials and proper installation rather than focusing only on the lowest upfront price. Good flashing, sound framing, correct fasteners, and thoughtful drainage will make a major difference in how any wood deck performs.

When Composite Is Worth the Investment

Composite often makes sense for a larger deck, a heavily used family gathering space, or a homeowner planning to stay in the home for many years. It is particularly attractive when low maintenance, consistent appearance, and resistance to moisture are high priorities.

It can also be a practical option for homeowners who are already managing a busy schedule, caring for children or aging family members, or simply want outdoor space that does not demand another home improvement task every season. The higher initial cost can be easier to justify when it reduces years of refinishing and board replacement.

Start With the Deck You Need, Not Just the Material

Before selecting a board color or comparing samples, think about how the deck needs to function. Will it host large cookouts, provide a quiet place for coffee, connect to a sunroom, improve access to the yard, or support safer entry for a family member with mobility concerns? Those answers affect the size, layout, stairs, railings, lighting, and material selection.

A thoughtful consultation should account for your home’s architecture, yard conditions, sun exposure, budget, and long-term plans. Old Dominion Innovations helps homeowners make those decisions with practical recommendations and skilled installation, so the finished deck feels like a reliable extension of the home.

The best deck material is the one that lets you use your outdoor space with confidence. Choose wood if its natural character and lower upfront cost suit your plans. Choose composite if a lower-maintenance, long-lasting surface better supports the way you want to live at home.

A Guide to Remodeling Project Timelines

A Guide to Remodeling Project Timelines

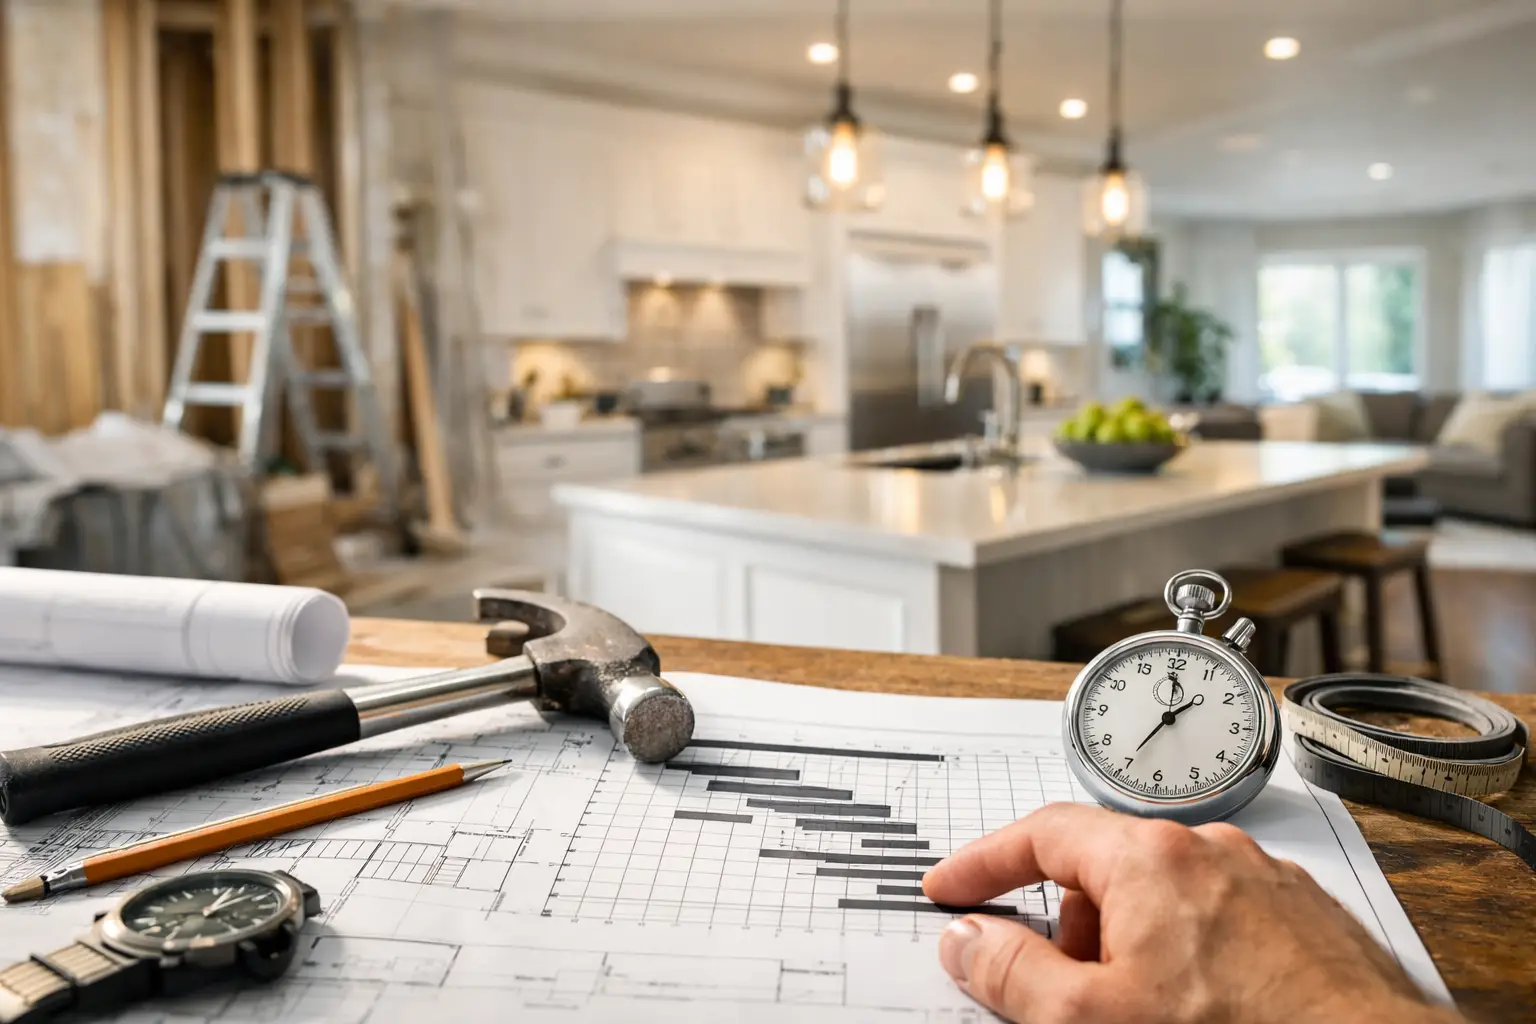
A remodeling schedule can feel straightforward at the kitchen-table stage: choose a design, hire a contractor, and wait for the finished room. In practice, a well-managed renovation has several connected phases, each with decisions, inspections, deliveries, and trade work that must happen in the right order. This guide to remodeling project timelines helps Richmond-area homeowners understand what drives the schedule and how to plan without treating every date as a promise carved in stone.

The most reliable projects are not necessarily the fastest ones. They are the ones that allow enough time for thoughtful planning, quality workmanship, clear communication, and the occasional surprise behind an older wall. A realistic timeline protects your budget, your daily routine, and the finished result.

What Shapes a Remodeling Project Timeline?

Project size is the obvious factor, but it is not the only one. Replacing finishes in a bathroom is very different from moving plumbing, changing the layout, or adding an accessible shower. Likewise, a deck refresh may move quickly, while a larger deck renovation involving structural repairs, permits, or custom features requires more coordination.

The scope of work determines how many professionals and inspections are involved. A cosmetic update may need demolition, drywall repair, painting, flooring, and fixture installation. A full renovation may also involve design decisions, engineering, electrical changes, plumbing relocation, framing, permitting, and multiple inspections.

Material availability matters as well. Common tile, standard fixtures, and in-stock flooring can keep a project moving. Custom cabinetry, specialty windows, made-to-order glass, or specific appliances may have longer lead times. Ordering early is often one of the best ways to avoid a preventable pause once construction begins.

For homeowners in Richmond, Henrico, Hanover, Mechanicsville, Ashland, and Glen Allen, permit requirements can also affect timing. Permit review periods vary by locality and by the complexity of the work. A reputable contractor accounts for this process instead of scheduling construction around an approval that has not yet been issued.

A Guide to Remodeling Project Timelines, Phase by Phase

Consultation, scope, and budget: one to three weeks

The first phase is where a project becomes practical. During a consultation, the contractor learns how you use the space, what is not working, what outcomes matter most, and what investment range makes sense. For a bathroom, that may mean better storage, safer access, or a more comfortable shower. For an addition or sunroom, it may mean creating usable space that feels connected to the rest of the home.

This is also the right time to discuss priorities. If the budget cannot support every wish-list item, it is better to make thoughtful adjustments now than to make rushed compromises after demolition. A clear scope creates a stronger schedule because everyone understands what is being built.

Design, selections, and approvals: two to eight weeks

Some projects need only a few finish selections. Others require detailed plans, measurements, product research, and approvals. The more custom the renovation, the more time this phase deserves.

Homeowners can help keep the process on track by making selections promptly once options are presented. Tile, cabinetry, countertops, plumbing fixtures, lighting, paint colors, and hardware may seem like separate decisions, but they affect ordering, installation sequence, and cost. Choosing a vanity after tile work is underway, for example, can create avoidable changes.

For additions, structural changes, and certain outdoor projects, plans and permits may overlap with the selection process. This work can feel slow because the finished space is not yet visible, but careful preparation is what prevents expensive corrections later.

Ordering materials and scheduling labor: two to twelve weeks

After the scope and selections are confirmed, materials can be ordered and the work can be scheduled. Lead times vary widely. Stock items may arrive quickly, while custom products can take several weeks or longer.

A dependable contractor coordinates trade professionals around the project rather than simply starting demolition and hoping every item arrives on time. In many cases, it makes sense to wait until key materials are confirmed before beginning. That approach may feel less immediate, but it reduces the chance that your home sits partially dismantled while a critical item is delayed.

Construction: the timeline homeowners see

Construction length depends on the work itself. These ranges are planning estimates, not guarantees, because hidden conditions and material changes can alter the path.

A straightforward bathroom refresh may take two to four weeks. A full bathroom remodel with layout changes, waterproofing, tile installation, plumbing, electrical work, and inspections commonly takes four to eight weeks. Tile-heavy bathrooms often require patience because proper preparation, setting, grouting, and curing cannot be rushed without risking the finish.

A deck renovation can take one to four weeks once work begins, depending on size, structural repairs, railings, stairs, and weather. Sunrooms and additions are larger undertakings that may require several months from construction start through final details, particularly when foundations, framing, roofing, windows, mechanical systems, and inspections are involved.

During this phase, work rarely happens in a straight line. Demolition may be followed by framing and rough plumbing. Then inspections may occur before insulation and drywall. Flooring, cabinetry, countertops, trim, paint, fixtures, and final adjustments each have their own sequence. A day that appears quiet may be a necessary curing period or a scheduled gap between trades, not a sign that the project has been forgotten.

Final details and walkthrough: several days to two weeks

The last portion of a renovation is where the space is refined. Contractors complete touch-ups, install remaining hardware, test fixtures, address punch-list items, and make sure the work is ready for the homeowner. Final inspections may also be needed, depending on the scope.

A thorough walkthrough is valuable. It gives you the opportunity to ask questions about care, operation, and any detail that needs attention. The goal is not just to finish the work, but to hand over a space that functions well in daily life.

What Can Delay a Remodel?

Some delays are manageable with planning. Others cannot be fully predicted. Weather can affect exterior work, especially decks, roofing connections, additions, and deliveries. Permit timing is controlled by the reviewing authority. Product damage, shipping changes, and manufacturer backorders can occur even after careful ordering.

Older homes can also reveal conditions that were not visible during the initial walkthrough. Water damage, outdated wiring, improper previous repairs, or subfloor issues may need to be corrected before new finishes go in. While no homeowner wants unexpected work, addressing these conditions properly protects the investment and helps prevent future problems.

Changes requested after construction starts are another common source of schedule movement. Sometimes a change is absolutely worth making. If you discover that a wider doorway, more accessible shower entry, or additional storage would better serve your family, it may be the right decision. Just understand that changes can require new materials, revised labor, or additional approvals.

How Homeowners Can Help Keep Work Moving

Good communication makes a meaningful difference. Before work begins, ask how updates will be handled, who your main point of contact will be, and how decisions or unexpected findings will be communicated. You should know what is happening in your home and what is expected next.

Prepare the work area as requested and make arrangements for pets, children, and access to rooms that may be temporarily unavailable. For a bathroom remodel, families should discuss in advance which bathroom will be used during construction. For kitchen, addition, or accessibility work, consider how daily routines may need to shift for a few weeks.

It also helps to keep decisions timely. A contractor can offer guidance, but installation cannot proceed until key choices are made. If you are comparing options, focus first on selections that affect ordering and rough-in work, such as cabinetry, plumbing fixtures, appliances, and lighting.

Most of all, leave room in your personal calendar for reality. Avoid planning a major gathering, move, or holiday event around the exact final day of a renovation. A small buffer reduces stress if an inspection is rescheduled or a finishing material arrives later than expected.

Choose a Timeline That Protects the Result

The right remodeling timeline balances urgency with care. Starting too quickly without firm selections, confirmed materials, or a defined scope can create more disruption than it saves. On the other hand, a contractor who communicates clearly, coordinates work carefully, and respects your home can make even a substantial renovation feel manageable.

At Old Dominion Innovations, the conversation begins with your goals, your home, and the way your family lives in it. A well-planned schedule will not eliminate every variable, but it gives your project the best chance to move forward with confidence, quality, and fewer unwelcome surprises.

How to Plan Accessibility Upgrades at Home

How to Plan Accessibility Upgrades at Home

A bathroom that once worked well can become a daily source of worry when stepping over the tub feels unsteady, the doorway is too narrow for a walker, or there is nothing solid to hold while getting up. These concerns often build gradually, which is why knowing how to plan accessibility upgrades before a fall or health change forces a rushed decision can make all the difference.

For many Richmond-area homeowners, accessibility is not about making a home feel clinical. It is about making everyday routines safer, more comfortable, and easier to manage while preserving the style and value of the home. A thoughtful plan lets you address the highest-priority needs first, avoid costly rework later, and create a space that supports independence for years to come.

Start With Daily Routines, Not a Product List

The best accessibility plan starts with the people using the home and the moments that feel difficult. A grab bar, ramp, or curbless shower may be the right solution, but only after you understand the problem it needs to solve.

Walk through a normal day at home. Notice where balance is needed, where someone has to squeeze through a tight opening, and where reaching, bending, or standing for long periods causes strain. The entry from the driveway, bathroom, kitchen, laundry room, and bedroom are often the most useful places to evaluate first.

Ask practical questions. Can everyone enter the house safely in rain, darkness, or while carrying groceries? Is there a bedroom and full bathroom on the main level? Can a person sit down and stand up from the toilet without relying on a towel bar or vanity? Are light switches, door hardware, and storage easy to reach and operate?

This assessment should include future needs as well as current ones. A homeowner recovering from surgery may need temporary support, while a family planning to remain in the home long term may benefit from more permanent improvements. The scope depends on the household, the home’s layout, and the level of mobility involved.

Prioritize Safety and Independence First

When budget or timing requires the project to happen in phases, begin with upgrades that reduce the clearest risks. Bathrooms are usually first on the list because wet floors, tub walls, and limited floor space create a higher chance of slips and falls.

A well-planned bathroom remodel may include a low- or zero-threshold shower, secure grab bars placed at the right height, a shower seat, a handheld showerhead, slip-resistant flooring, and a comfort-height toilet. These details work best when they are designed together. Adding one item at a time can help, but a coordinated remodel gives the room a more polished appearance and allows the layout to support safe movement.

Entry access is another high-value priority. A stable, well-lit path and a properly designed ramp or threshold transition can make the difference between needing assistance and entering the home independently. Handrails should be secure and comfortable to grip, and exterior surfaces should provide traction in changing Virginia weather.

Inside the house, consider wide doorways, lever-style handles, better lighting, and clear pathways between frequently used rooms. These improvements may feel modest, yet they can make a home easier for people of different ages and abilities to use.

Build a Whole-Home Plan for Accessibility Upgrades

Even if you only renovate one room now, it helps to look at the property as a connected system. A beautiful accessible shower has limited value if the bathroom door is too narrow, the hallway is difficult to navigate, or the only bedroom is upstairs.

Create a simple map of the routes used most often: parking area to entry, entry to kitchen, bedroom to bathroom, and living spaces to outdoor areas. Note changes in floor height, narrow corners, poor lighting, loose rugs, stairs, and doors that are hard to open. This gives your contractor a clearer picture of how the home functions beyond the room being remodeled.

For some households, a first-floor addition with a bedroom and accessible bath may be more practical than repeated changes to an upstairs layout. For others, remodeling an existing main-level bathroom delivers the greatest immediate benefit. There is no single answer. The right investment depends on the home’s structure, the family’s plans, and whether the goal is aging in place, accommodating a loved one, or improving day-to-day safety now.

Set a Budget That Accounts for the Work Behind the Walls

Accessibility upgrades are often more involved than they appear. A grab bar, for example, must be anchored into adequate framing or blocking so it can reliably support weight. Converting a tub into a curbless shower may require changes to the floor structure, plumbing locations, waterproofing, drainage, and tile installation.

That is why homeowners should plan for both visible selections and the construction work required to make them safe and durable. A low initial price can become expensive if essential preparation is skipped or if work must be opened back up later to correct a problem.

During the planning stage, separate your budget into three areas: must-have safety improvements, preferred comfort or style upgrades, and future enhancements that can wait. For example, a homeowner may prioritize a safer shower and improved lighting now while planning to replace adjacent flooring or widen another doorway in a later phase.

It is also wise to keep a contingency amount for conditions that are only discovered after construction begins, such as outdated plumbing, water damage, or insufficient framing. A dependable contractor should explain potential variables clearly and communicate before making changes that affect cost or schedule.

Choose Materials That Are Safe, Durable, and Easy to Maintain

Accessible design does not require sacrificing the look of a well-finished home. The goal is to select materials that support safe use without creating unnecessary maintenance.

In bathrooms, textured porcelain tile, properly selected luxury vinyl, and other slip-resistant surfaces can provide better footing than highly polished materials. Contrast between the floor, walls, and fixtures can also help users see edges and transitions more clearly. Good lighting matters just as much. Layered lighting at the vanity, shower, and room entry reduces shadows that can make small changes in level harder to see.

For cabinetry and storage, think about reach and ease of use. Pull-out shelves, D-shaped or bar pulls, and drawers that open smoothly are often more convenient than deep cabinets with small knobs. In the kitchen, a mix of counter heights or a seated work area can be useful, although it may not be necessary for every household.

The best choices balance function with the way you want the space to look. A contractor who understands remodeling can help coordinate finishes so safety features feel intentional rather than added as an afterthought.

Work With a Contractor Who Plans Before Demolition

Accessibility work should be tailored to the person and the home. Measurements, clearances, fixture locations, wall construction, drainage, and transitions between rooms all affect whether an upgrade works well in real life.

Before construction starts, ask how the contractor evaluates the existing space, handles permits when needed, protects occupied areas of the home, and communicates through changes. You should also discuss the order of work and how long key spaces, especially bathrooms and entryways, may be unavailable.

A full-service remodeling contractor can be particularly helpful when accessibility improvements overlap with broader needs such as bathroom renovation, deck access, a sunroom transition, or an addition. Coordinating these pieces under one plan helps prevent mismatched finishes, duplicated labor, and decisions that create obstacles later.

At Old Dominion Innovations, the planning conversation begins with how your household actually lives in the home. That hands-on approach helps turn a general concern about safety into practical improvements that fit the property, the budget, and the family’s routine.

Make the Home Easier to Use Without Waiting for a Crisis

The most successful accessibility upgrades are often the ones completed before they become urgent. A safer shower can be appreciated by guests, a parent with a temporary injury, and a homeowner planning to stay put. Better lighting and easier-to-use doors improve convenience for everyone, not only someone with a diagnosed mobility limitation.

Start with the part of the home that creates the most daily frustration or concern, then build outward with a clear long-term plan. A home should not ask its owners to take unnecessary risks simply to move through an ordinary day.

What Adds Value in a Bathroom Remodel Today?

What Adds Value in a Bathroom Remodel Today?

A bathroom can be beautifully finished and still miss the mark if it does not work for the people using it every day. When homeowners ask what adds value in a bathroom remodel, the answer is rarely one luxury feature or the latest trend. Real value comes from a space that feels current, functions reliably, fits the home, and gives future buyers fewer reasons to hesitate.

For homeowners in Richmond, Henrico, Hanover, Mechanicsville, Ashland, and Glen Allen, the best remodeling decisions balance resale appeal with the way your household lives now. A well-planned bathroom should make busy mornings easier, support safety where needed, and hold up to years of moisture, use, and cleaning.

Start With the Improvements Buyers and Homeowners Notice

The highest-value bathroom remodels usually solve visible problems first. An outdated vanity, poor lighting, stained tub surround, worn flooring, inadequate storage, and failing fixtures can make an otherwise well-kept home feel neglected. Addressing these basics creates an immediate impression of care and quality.

A clean, cohesive design matters more than filling the room with expensive features. Buyers and guests tend to notice whether the tile, cabinetry, fixtures, paint, and lighting feel intentionally selected. That does not mean every bathroom needs marble or custom cabinetry. It means the materials should look durable, fit the home’s price point, and work together without appearing overly trendy.

In many older Richmond-area homes, layout limitations are part of the project. A skilled remodel can improve how the room feels without necessarily moving every wall or plumbing line. Replacing a bulky vanity with a better-proportioned model, choosing a glass shower enclosure, adding recessed storage, or correcting poor lighting can make a compact bathroom feel far more useful.

What Adds Value in a Bathroom Remodel: Function First

A bathroom that looks polished but has no storage, weak ventilation, or poor lighting will become frustrating quickly. Functional upgrades often deliver some of the most meaningful value because they improve the daily experience and help protect the home.

A practical shower or tub arrangement

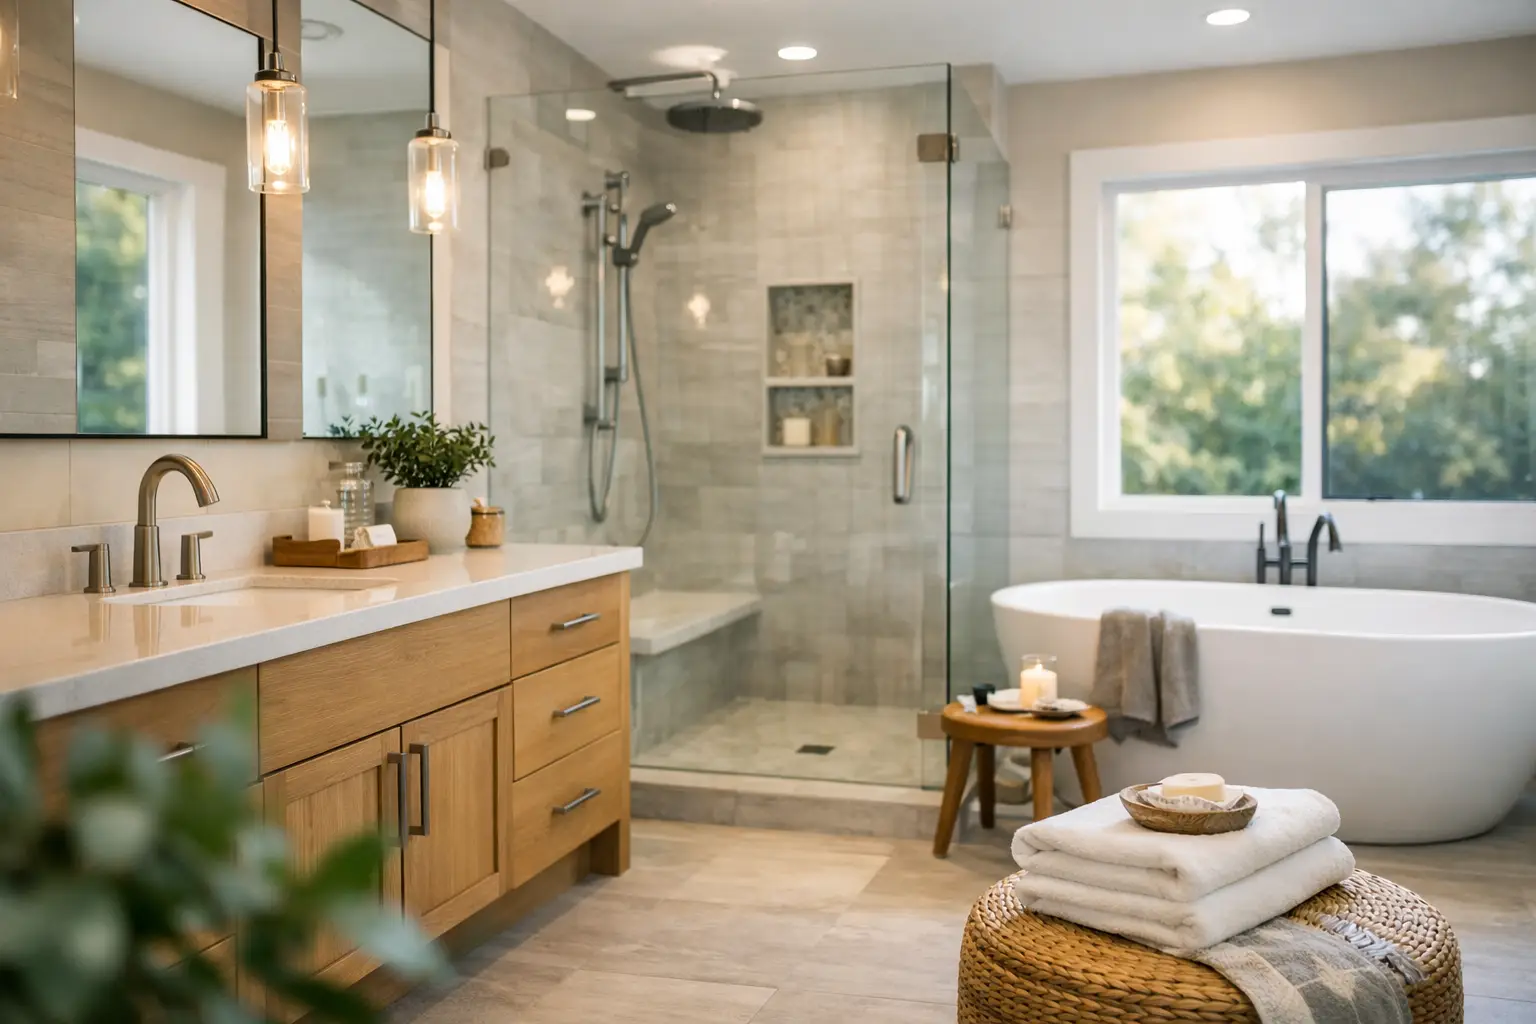
For a primary bathroom, a roomy walk-in shower is often a strong investment, especially when it replaces a dated or difficult-to-clean enclosure. Features such as a low threshold, properly sloped floor, built-in niche, and quality glass can make the shower feel both more comfortable and more refined.

However, removing the only bathtub in a home can be a trade-off. Families with young children and many future buyers still value having at least one tub. If the house has multiple bathrooms, converting one tub to a shower may make perfect sense. If it is the only full bath, preserving a tub or choosing a tub-shower combination may be the wiser long-term decision.

Storage that keeps countertops clear

Vanity drawers, linen storage, recessed medicine cabinets, and shower niches have a bigger impact than their size suggests. They reduce clutter and make the room easier to use. A vanity with deep, organized drawers is often more valuable to a homeowner than a larger cabinet with one hard-to-reach open space.

Storage should be planned around the room’s actual users. A family hall bath may need room for towels, hair tools, and children’s bath items. A primary bathroom may benefit from separate vanity storage or a dedicated linen cabinet. Good planning is not about adding cabinets everywhere. It is about making the available square footage work harder.

Lighting that serves more than one purpose

A single overhead fixture is rarely enough. Better bathroom lighting combines general illumination, focused vanity lighting, and, where possible, natural light. Proper lighting at the mirror reduces shadows for shaving, makeup, and daily grooming, while recessed ceiling lights can brighten the rest of the room.

Dimmable fixtures are a practical upgrade for early mornings and late nights. So is a quiet exhaust fan that actually clears humidity. Ventilation may not be the most glamorous line item in a remodel, but it helps prevent moisture damage, peeling paint, mildew, and premature wear on finishes.

Durable Materials Protect the Investment

Bathrooms are hard-working spaces. Materials need to handle water, heat, soap, cleaning products, and frequent use without becoming a maintenance burden. This is where quality craftsmanship and proper installation are just as important as the products themselves.

Porcelain or ceramic tile remains a dependable choice for floors and shower walls because it is durable, water-resistant, and available in many styles. Larger-format tile can create a cleaner visual effect with fewer grout lines, but it must be installed carefully on a properly prepared surface. Natural stone can be beautiful, but it typically requires more maintenance and may not be the right fit for every budget or household.

For countertops, quartz is popular because it provides a polished appearance with low maintenance. Solid-surface and quality laminate options can also make sense in secondary bathrooms when budget is a priority. The goal is to avoid choosing materials solely because they look impressive in a showroom. Consider how they will perform after years of real life.

Behind the finished surfaces, waterproofing is essential. Tile and grout alone do not make a shower waterproof. Proper substrate preparation, waterproof membranes, sealed transitions, and careful plumbing work help prevent the hidden damage that can turn a bathroom project into a costly repair later.

Accessibility Features Can Add Lasting Value

Accessibility improvements are often associated with aging in place, but many of them make bathrooms more comfortable for everyone. A curbless or low-threshold shower, wider doorway, lever-style faucet handles, handheld showerhead, comfort-height toilet, and well-placed grab bars can support independence without making the space feel institutional.

The best time to plan for these details is during a full remodel, when walls and flooring are already open. Even if grab bars are not needed today, adding blocking inside shower and toilet walls allows them to be installed securely later. This is a modest planning step that can make a meaningful difference for a homeowner’s future needs.

Design matters here. Today’s accessibility products come in finishes and styles that coordinate with modern bathrooms. A thoughtfully designed accessible bathroom can be both attractive and practical, which broadens its appeal rather than limiting it.

Spend Where It Counts, Not Everywhere

A bathroom remodel should be scaled to the home and neighborhood. Overbuilding can make it harder to recover the cost of a project, particularly if a high-end design is out of step with the rest of the property. On the other hand, choosing the cheapest fixtures, skipping ventilation, or cutting corners on waterproofing can undermine the remodel before it has time to add value.

It is generally smart to invest in the elements that are difficult or expensive to change later: plumbing work, shower construction, waterproofing, flooring preparation, electrical updates, ventilation, and cabinetry installation. Decorative items such as mirrors, towel bars, and some light fixtures can be updated more easily down the road.

Avoid making permanent selections based entirely on a short-lived trend. Bold wallpaper, distinctive tile, or dramatic hardware can work beautifully when used with intention, especially in a powder room. For a primary or hall bathroom, timeless colors and straightforward layouts tend to serve homeowners and resale value well. Warm whites, soft neutrals, natural wood tones, and classic metal finishes can still feel fresh without locking the room into one moment.

A Better Layout Can Be Worth More Than Added Square Footage

Moving plumbing can increase project cost, but sometimes it is the right decision. A cramped toilet location, unusable shower, or vanity that blocks the door may justify a more substantial layout change. The key is to evaluate the improvement against the added construction involved.

Before deciding to relocate fixtures, look for lower-cost layout improvements. Can the door swing be changed or replaced with a pocket door? Could a wall-hung or narrower vanity improve circulation? Would a shower niche eliminate the need for a bulky storage unit? Small adjustments can have an outsized effect in a compact room.

A consultation-led approach helps homeowners see these options before construction begins. At Old Dominion Innovations, the focus is on helping homeowners make practical choices that fit their home, goals, and budget – not pushing upgrades that do not add meaningful benefit.

Plan for a Bathroom That Feels Finished

Details are what separate a rushed update from a remodel that feels complete. Matching hardware finishes, properly placed outlets, easy-to-clean grout, a quiet fan, adequate towel storage, and trim work that meets neatly at walls and floors all contribute to the final impression.

Just as important is the project experience itself. A bathroom is one of the most disruptive rooms to renovate because it affects daily routines. Clear communication, careful scheduling, respect for the home, and clean work areas protect more than convenience. They help the homeowner feel confident throughout the process.

The most valuable bathroom is not necessarily the one with the highest price tag. It is the one that solves real problems, looks appropriate for the home, and is built carefully enough to keep working long after the dust has settled. Start with how you want the room to serve your household, then choose improvements that will make that goal feel solid every day.

Kitchen or Bathroom Remodel: Which Comes First?

Kitchen or Bathroom Remodel: Which Comes First?

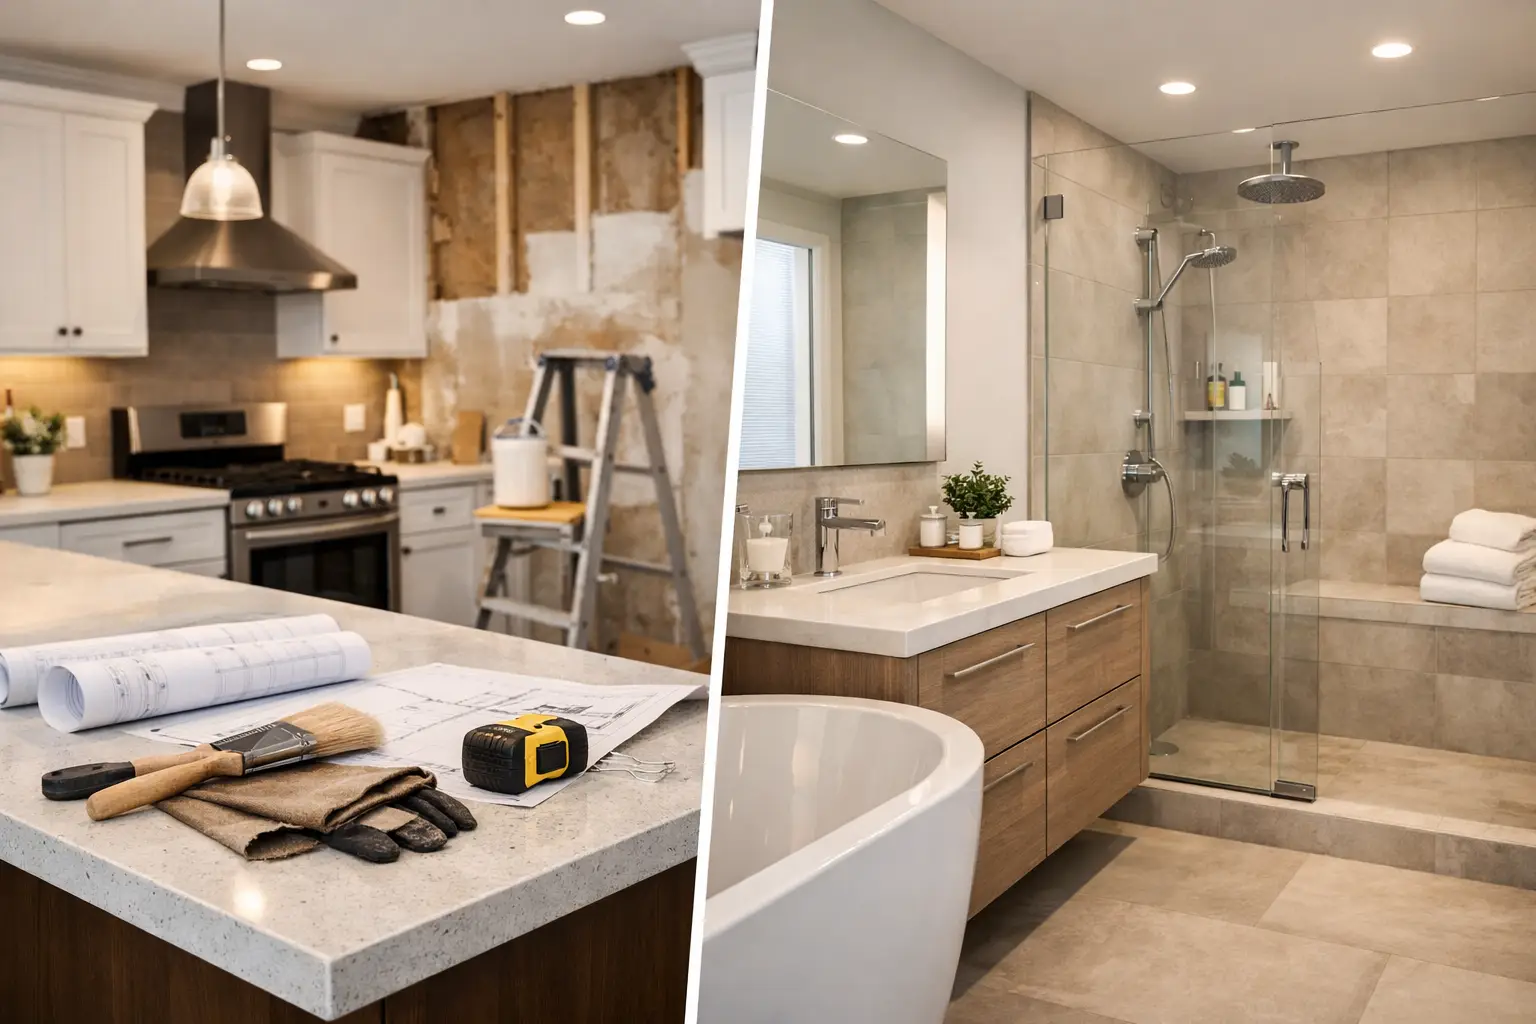
A kitchen or bathroom remodel can change how your home feels every day, but choosing between the two is rarely as simple as picking the room that looks most dated. One may frustrate your family at every meal, while the other may have a leaking shower, poor lighting, or safety concerns that cannot wait. The right first project is the one that solves the most meaningful problem for your household while fitting your budget, schedule, and long-term plans.

For homeowners across Richmond, Henrico, Hanover, Mechanicsville, Ashland, and Glen Allen, the decision often comes down to practical use. A beautiful renovation should also make daily routines easier, protect the home from damage, and support the way your family lives now.

Kitchen or Bathroom Remodel: Start With the Need

Before comparing finishes or collecting inspiration photos, identify what is not working. A kitchen may be visually outdated but still functional, while a bathroom with a failing tub surround or soft flooring may be allowing moisture damage to spread behind the walls. In that case, the bathroom deserves attention first, even if the kitchen has been on your wish list longer.

Ask yourself a few direct questions. Is there a safety issue? Is water causing damage? Does the space create daily stress for multiple people? Is the room limiting someone’s independence or mobility? The answers usually point to the better starting place.

A bathroom renovation is often the priority when a homeowner needs a safer shower entry, better lighting, grab bars, more secure flooring, or a layout that works for aging in place. These improvements are not simply cosmetic. They can help a family member remain comfortable and independent at home.

A kitchen should move to the front of the line when its layout disrupts everyday life. Limited prep space, worn cabinetry, unreliable appliances, inadequate storage, and poor traffic flow become especially noticeable in busy households. If the kitchen is where everyone gathers, works, cooks, and does homework, improving it can have an immediate effect on how the whole home functions.

Compare the Daily Disruption Honestly

Both projects involve temporary inconvenience, but they affect your household differently. A kitchen remodel usually has a broader impact because it interrupts cooking, food storage, and family routines. Depending on the scope, you may be working around dust, limited counter space, and a temporary meal setup for several weeks.

A bathroom remodel can be easier to manage if your home has another full bathroom. If it is the only bathroom in the house, however, the project requires more careful planning. A contractor should help you understand the expected sequence of work, when plumbing will be unavailable, and how to keep the rest of the home clean and usable.

There is no single rule here. A family with two bathrooms may find a bathroom renovation very manageable, while a household with young children may prefer to avoid losing the kitchen during the school year. Consider vacations, holidays, work-from-home schedules, visiting relatives, and major family events before setting a start date.

Budget Is About Scope, Not Just Room Size

Homeowners sometimes assume a bathroom must cost less because it is smaller. That can be true, but bathrooms contain plumbing, waterproofing, tile work, ventilation, fixtures, and detailed finish work in a compact area. Moving a shower, toilet, or vanity can add cost quickly when plumbing must be relocated.

Kitchen budgets are often driven by cabinetry, countertops, appliances, flooring, electrical work, and layout changes. A modest kitchen refresh with updated surfaces and fixtures is different from a full renovation that removes walls, changes the floor plan, or adds an island with new electrical and plumbing connections.

The most useful budget conversation is not, “What is the cheapest way to do this?” It is, “What work needs to be done correctly now so we do not pay for it twice?” Quality waterproofing behind a shower, proper ventilation, sound electrical work, and durable installation practices protect your investment long after the new finishes are installed.

A good remodeling plan also leaves room for the unknown. Older Richmond-area homes can reveal hidden issues once walls or flooring are opened, such as aging plumbing, damaged subflooring, or outdated wiring. Planning a reasonable contingency helps prevent a surprise from becoming a stalled project.

Consider Value, but Do Not Remodel Only for Resale

Kitchens and bathrooms are two of the most closely watched spaces when buyers evaluate a home. Updated versions can improve appeal, but resale value should be one factor, not the only factor. If you plan to stay in your home for years, the daily benefit of a layout that works for you matters just as much.

A kitchen renovation may have the stronger emotional impact for buyers because it is highly visible and central to entertaining. Clean, functional cabinetry, useful storage, durable counters, and a cohesive design can make the whole home feel more current.

A bathroom renovation can make an equally important impression, especially when the existing room feels cramped, worn, or difficult to maintain. A well-designed bathroom with practical storage, effective lighting, comfortable ventilation, and easy-to-clean materials can make mornings and evenings noticeably better.

If resale is on the horizon, avoid choices that are too personal or too expensive for the neighborhood. Timeless materials, sensible layouts, and professionally completed work tend to serve homeowners well. If this is your long-term home, you can place more weight on features that fit your lifestyle, such as a curbless shower, a larger pantry, or a dedicated coffee station.

Decide Whether Layout Changes Are Worth It

The most dramatic improvements often come from changing how a room works, not simply changing its color palette. In a kitchen, that may mean widening a passageway, improving the relationship between the sink, range, and refrigerator, or adding storage where it is actually needed. In a bathroom, it may mean replacing an oversized tub with a more usable shower, expanding a vanity, or reconfiguring a tight layout.

Layout changes can be worthwhile, but they involve trade-offs. Moving plumbing and electrical components adds complexity. Removing walls may require structural evaluation. The best solution balances the improvement you want with the construction work required to achieve it.

During an in-home consultation, be clear about how you use the space. Mention the crowding that happens during dinner preparation, the lack of a place to put towels, the difficulty of stepping into the tub, or the cabinet doors that collide every morning. These details help shape a design around real life instead of a showroom image.

Think About Timing and Project Sequence

If both rooms need work, it may make sense to plan them as phases rather than treat them as unrelated projects. Completing the bathroom first can address a water or safety concern, followed by the kitchen when your schedule allows. In other homes, starting with the kitchen makes sense because it is the largest source of daily frustration.

There are also situations where coordinating projects can be practical. If electrical upgrades, flooring work, painting, or broader renovation work will affect multiple areas, a thoughtful overall plan may reduce repeated disruption. That does not mean every project should happen at once. It means the first project should not create avoidable complications for the second.

Material lead times and product availability can also influence the schedule. Cabinets, specialty tile, custom glass, and certain fixtures may require advance planning. Making key selections early helps keep decisions from slowing down construction once work begins.

What a Dependable Remodeling Process Should Feel Like

A kitchen or bathroom remodel asks homeowners to place a great deal of trust in the people working inside their home. You should expect clear communication, realistic scheduling, respectful crews, and straightforward conversations about scope and cost. The contractor should listen before recommending solutions and explain the work in plain language.

You should also feel comfortable asking how your home will be protected during construction, how dust and debris will be managed, who will oversee the work, and how changes will be handled if they arise. A polished finished room matters, but so does the experience of getting there.

Old Dominion Innovations helps Richmond-area homeowners evaluate these decisions with practical, consultation-led guidance. The goal is not to push the larger project. It is to help you make an informed investment in a space that works better, looks right for your home, and is built to serve your family well.

The best first remodel is the one that removes a real burden from daily life. Whether that means a safer bathroom, a more capable kitchen, or a plan for both spaces over time, start with the room that will give your household the greatest relief every day.

Bathroom Layout Planning Guide for Richmond Homes

Bathroom Layout Planning Guide for Richmond Homes

A bathroom can have beautiful tile, a new vanity, and polished fixtures yet still feel frustrating every morning. The difference is usually the layout. A thoughtful bathroom layout planning guide starts with how your household actually uses the room: who gets ready there, where towels belong, whether the door blocks the vanity, and how easily someone can move through the space.

For Richmond-area homeowners, layout decisions also shape the cost and scope of a remodel. Moving plumbing, reframing a wall, or expanding into an adjacent closet can create a far more comfortable bathroom, but those changes need to be weighed against the budget and the value they deliver. Planning carefully before construction helps prevent expensive changes after work begins.

Start With the Room You Have

Before choosing a tub, shower tile, or cabinet color, measure the existing bathroom accurately. Record the room length and width, ceiling height, window placement, door swing, heating vents, and the location of every plumbing fixture. Photographs from several angles are useful as well, particularly in older homes where walls may not be perfectly square.

Next, identify what is not working. A cramped doorway, a single sink shared by two people, poor lighting at the mirror, or a shower that is difficult to step into are not small inconveniences. They are the reasons to change the layout. Prioritize these daily problems before adding features that look good on a showroom floor but do not improve the way the room functions.

A contractor can also help determine what sits behind the walls. Plumbing lines, structural framing, electrical wiring, and HVAC components affect what can realistically move. Keeping fixtures in roughly the same locations often helps control costs. On the other hand, relocating one fixture may be worthwhile when it solves a long-term accessibility concern or turns an awkward primary bath into a room your family can enjoy for years.

Bathroom Layout Planning Guide: Design Around Movement

A functional bathroom has clear paths. You should be able to enter, close the door, use the vanity, access storage, and step into the shower without bumping into another fixture. That sounds basic, but tight layouts often reveal their flaws only after the new cabinets and glass doors are installed.

Door placement deserves early attention. A swinging door can consume valuable floor space and interfere with a toilet or vanity. In some rooms, changing the swing direction or using a pocket door creates a better path without adding square footage. Pocket doors are not right for every wall, since the wall must have room for the door and may contain plumbing or wiring, but they can be a practical answer in a small hall bath.

Plan for enough open space in front of the vanity, toilet, and shower entrance. Exact requirements depend on the room and applicable local code, so a licensed remodeling professional should confirm the details before construction. Beyond minimum requirements, consider real-life use. If two people get ready at once, they need room to pass each other. If a child uses a step stool or a caregiver may need to assist an aging parent, extra clearance matters even more.

Put the Vanity Where It Works Hardest

The vanity is often the most-used part of the bathroom. A wider countertop, two sinks, or additional drawers can improve busy mornings, but only if the cabinet does not choke the room’s walking path. In a smaller bathroom, one well-proportioned sink with generous counter space and drawer storage may work better than forcing in a double vanity.

Think about what you need within reach. Everyday items should have a dedicated drawer or cabinet, while outlets should be conveniently placed for grooming tools. Mirror size and lighting should be planned with the vanity rather than treated as last-minute selections. Side lighting and overhead lighting together usually provide a more useful result than a single fixture above the mirror.

Choose the Right Shower and Tub Arrangement

A walk-in shower can make a bathroom feel larger and may improve access, especially when designed with a low or curbless entry. It also gives homeowners flexibility to include a built-in bench, handheld showerhead, recessed storage niche, and grab bars that blend naturally into the finished design.

However, removing the only bathtub in a home is not always the right choice. Families with young children often value at least one tub, and some buyers expect one in a primary residence. If the home has another bathtub, converting an underused primary tub into a larger shower may make excellent sense. The best choice depends on your household, the home’s overall layout, and how long you expect to stay.

For a combination tub and shower, pay close attention to the surround, curtain or glass enclosure, and storage for shampoo and soap. For a separate shower, make sure the door has adequate clearance and does not collide with the vanity or toilet. A fixed glass panel can be visually clean and easier to manage in certain layouts, while a hinged door may provide better splash control in others.

Plan Storage Before You Finish the Walls

Bathroom clutter is often a layout problem disguised as an organization problem. If there is no place for towels, medications, cleaning supplies, extra toilet paper, or hair tools, those items end up on the counter and floor.

Look for storage opportunities that do not make the room feel crowded. A linen closet just outside the bathroom may be more useful than squeezing a tall cabinet inside. Recessed medicine cabinets, vanity drawers, shower niches, and built-in shelves can add function without taking up valuable circulation space. In a larger primary bathroom, a separate linen cabinet or storage tower may be worth the footprint.

Keep safety in mind when deciding where items go. Cleaning products and medications should have secure storage, and frequently used towels should be reachable without stretching across a wet floor. The right plan makes the room easier to maintain, not just easier to photograph.

Make Accessibility Part of the Initial Plan

Accessibility upgrades work best when they are considered from the beginning rather than added after a fall or injury. That does not mean every bathroom needs a fully barrier-free design. It means the layout should reflect your household’s current needs and future plans.

A wider opening, a lever-style faucet, a comfort-height toilet, and a shower with a low threshold can make everyday use easier for people of many ages. Reinforcing walls for future grab bars during a remodel is a small step that can save disruption later. Non-slip flooring, strong lighting, and reachable controls also support safer use without making the room feel institutional.

For homeowners planning to age in place, space for a walker or caregiver may be more important than a larger soaking tub. These choices are personal, and a consultation-led design process helps sort through the trade-offs before materials are ordered.

Coordinate Lighting, Ventilation, and Electrical Needs

Good layout planning extends beyond the visible fixtures. A bathroom needs layered lighting for grooming, general illumination, and nighttime use. Consider where shadows will fall at the mirror, whether a dimmer would improve the room, and where outlet placement will be most practical.

Ventilation is equally important in Central Virginia’s humid summers. A properly sized exhaust fan helps manage moisture that can damage paint, encourage mildew, and shorten the life of finishes. Its location, duct routing, and control should be planned alongside the new layout, not after tile and drywall are complete.

Heated floors, towel warmers, additional outlets, and upgraded lighting can make a bathroom more comfortable, but they may require electrical changes. Including them in the original scope allows the work to be scheduled efficiently and priced clearly.

Bring a Realistic Budget to the Layout Discussion

Every layout has a cost profile. Cosmetic updates with fixtures in their existing locations are typically less complex than a full reconfiguration involving new plumbing routes, structural changes, or an expanded footprint. That does not make major changes a poor investment. It simply means the budget should reflect the work required behind the finished surfaces.

Ask for a plan that identifies the priorities: must-have improvements, desirable upgrades, and items that can be adjusted if needed. This approach protects the features that matter most, whether that is a safer shower, more storage, or a vanity that finally fits the family routine. At Old Dominion Innovations, careful consultation and clear communication help homeowners make those decisions with fewer surprises during construction.

The best bathroom layout is not the one that copies a trend. It is the one that gives your household more room to move, store what it needs, and start or end the day comfortably. Bring your measurements, concerns, and wish list to the first planning conversation, then let the room’s real-life purpose guide each decision.

Whole Home Remodel Timeline: What to Expect

Whole Home Remodel Timeline: What to Expect

A whole home remodel timeline is rarely measured by the day you see demolition begin. The work that protects your budget, keeps decisions organized, and prevents avoidable delays often starts months earlier. For Richmond-area homeowners, a realistic plan accounts for design choices, permitting, material lead times, the condition of the existing house, and how your family will live during construction.

Most whole-home renovations take several months from the first consultation through the final walkthrough. A straightforward interior update may move more quickly, while a project involving additions, structural changes, major plumbing relocations, accessibility upgrades, or custom finishes can take much longer. The goal is not to rush the process. It is to create a clear sequence so quality work is completed correctly the first time.

A Realistic Whole Home Remodel Timeline

For many homes, the full process takes roughly 6 to 12 months from initial planning to completion. Construction itself may take 3 to 9 months, depending on the scope. That range can feel broad, but it reflects the reality that no two homes or families have the same needs.

A bathroom update, kitchen renovation, flooring replacement, and fresh paint may fit within a shorter construction window if the layout remains largely unchanged. A home that needs an addition, new deck, sunroom, electrical upgrades, redesigned bathrooms, accessibility features, or major structural work requires more coordination and more inspections.

The best timeline begins with honest conversations about priorities. If you need the home ready before a family event, school year, move-in date, or holiday season, share that early. A dependable contractor can help determine whether the desired finish date is realistic and which decisions need to happen first.

Phase 1: Consultation, Scope, and Budget Planning

The first phase commonly takes 2 to 6 weeks. This is when homeowners turn broad ideas into a workable project scope. You may know that your home feels dated or cramped, but the contractor needs to understand why it is not working for your household. Is the kitchen cut off from the living area? Is a downstairs bathroom needed for an aging parent? Is an unused porch better suited for a sunroom?

A thorough consultation should address the condition of the home, your goals for each space, desired finishes, budget range, and potential construction limitations. Older homes around Richmond, Henrico, Hanover, and Mechanicsville can have hidden conditions behind walls or beneath floors. Identifying likely risks early helps avoid building an unrealistic budget or schedule.

This is also the right time to decide what is essential and what is optional. For example, moving plumbing to create a larger bathroom may improve long-term function, but it adds cost and time compared with updating the existing layout. Clear priorities make later decisions easier when a material is unavailable or an unforeseen condition appears.

Phase 2: Design and Selections

Design and material selections often take 4 to 12 weeks. This stage includes refining layouts, choosing fixtures and finishes, confirming cabinetry, planning lighting, and making decisions that affect both price and installation order.

Homeowners sometimes think selection decisions can wait until construction begins. For a whole-home project, that approach can create unnecessary pauses. Tile, cabinetry, windows, appliances, specialty doors, and custom millwork may all have different lead times. A beautiful product is not always the right choice if it will hold up the project for months or does not fit the practical needs of the household.

A good remodeling partner helps you balance appearance, durability, maintenance, and availability. A busy family may benefit from hard-wearing flooring and easy-to-clean surfaces. A homeowner planning to age in place may prioritize curbless showers, wider doorways, lever handles, and better lighting. These are not minor details. They shape how well the finished home serves you every day.

Phase 3: Permits, Engineering, and Ordering

This phase can overlap with design, but it should not be treated as an afterthought. Permit timing varies based on the project and local jurisdiction. Work involving additions, structural changes, significant electrical or plumbing updates, decks, or altered layouts may require drawings, engineering, and permit review before construction can proceed.

In the Richmond area, review timelines can vary by locality and by the completeness of the submitted plans. An experienced contractor prepares the required information, communicates what is needed from the homeowner, and builds reasonable permit time into the schedule. No contractor can promise control over a municipal review office, but proactive preparation reduces preventable delays.

Ordering long-lead materials should happen as soon as selections are approved. Cabinets, windows, specialty tile, custom shower glass, and certain fixtures can affect the construction start date. Your contractor may recommend ordering key items before demolition so the project does not reach a standstill halfway through.

Phase 4: Pre-Construction Preparation

The week or two before work begins is when the plan becomes practical. Your contractor should review access to the home, work hours, material delivery areas, dust control, protection for floors and furniture, and communication expectations. For a whole-home renovation, this discussion matters just as much as the construction plan.

Some families remain in the home throughout the project. Others choose temporary housing, especially when the kitchen, multiple bathrooms, or essential bedrooms will be out of service. Neither choice is automatically right. Staying home can reduce temporary living costs, but it requires flexibility around noise, dust, limited access, and changing routines. Moving out may make construction more efficient, but it adds expense and logistics.

Before work begins, remove valuables, clear designated work areas, and make a plan for pets and children. If you are staying in the home, ask how temporary cooking, bathing, and laundry needs will be handled. A respectful contractor will take care to protect your home, but clear preparation helps everyone work safely and efficiently.

Phase 5: Construction and Inspections

Construction is usually the longest portion of the whole home remodel timeline. A typical sequence starts with site protection and demolition, followed by structural work, framing, plumbing, electrical, HVAC, insulation, drywall, flooring, cabinetry, trim, painting, fixtures, and final details.

Not every room will move at the same pace. One area may be ready for paint while another is waiting for an inspection or a cabinet delivery. That does not necessarily signal a problem. Whole-home remodeling involves coordinating skilled trades in the correct order, and inspections must occur before certain walls or systems are closed up.

The most common causes of timeline changes are hidden conditions, product delays, owner-requested changes, weather for exterior work, and inspection availability. Hidden damage, outdated wiring, plumbing issues, or structural concerns are especially common in older homes. When they appear, the right response is clear communication: explain the issue, outline the options, identify the cost and schedule effect, and obtain approval before moving forward.

Weekly updates can make a major renovation feel far more manageable. You should know what was completed, what is planned next, which decisions are needed from you, and whether any changes affect the budget or anticipated completion date. Old Dominion Innovations approaches this communication as part of the job, not an extra service.

Phase 6: Finishing Work and Final Walkthrough

The final stretch often takes longer than homeowners expect because it is detail-driven. Fixtures are installed, paint is touched up, hardware is adjusted, caulk lines are completed, and small items are corrected. This is not the time to cut corners. The details are what make a renovated home feel polished and ready to use.

During the final walkthrough, review each space carefully with your contractor. Test doors, drawers, lights, outlets, faucets, and appliances. Ask questions about new materials, maintenance, warranties, and any remaining items. A punch list is normal. What matters is that it is documented and completed with the same care given to the larger construction work.

How to Keep Your Remodel Moving Forward

Homeowners play an important role in keeping a project on track. Make major selections on schedule, respond promptly when approvals are needed, and avoid making late changes unless the improvement is truly worth the added time and cost. A new idea can be worthwhile, but changing a layout after plumbing or framing is complete has a very different impact than changing it on paper.

It also helps to reserve a contingency in both the budget and schedule. Remodeling an existing home involves variables that new construction does not. Planning for them does not mean expecting the worst. It means giving yourself room to make sound decisions if the house reveals something unexpected.

A well-managed renovation should not leave you guessing what happens next. With thoughtful planning, dependable craftsmanship, and steady communication, the temporary disruption leads to a home that works better for your family for years to come.