Blogs

How to Repair an Old Deck Before It Fails

How to Repair an Old Deck Before It Fails

A deck can look tired for years, then suddenly become a safety concern. One soft board near the steps, a railing that moves when someone leans on it, or posts sitting in damp soil can turn a favorite outdoor space into a project that should not wait. If you are researching how to repair old deck damage, the first question is not which stain to buy. It is whether the deck’s structure is still sound enough to repair.

Richmond-area decks take a beating from summer humidity, heavy rain, leaf buildup, and changing temperatures. A thoughtful inspection helps you separate surface-level wear from rot, movement, and connection failures that require more extensive work.

Start With a Safety Inspection

Before pulling boards or tightening screws, inspect the deck from the ground up. Walk slowly across the surface and pay attention to any bounce, soft spots, raised fasteners, cracked boards, or areas that feel uneven. Then look underneath, using a bright flashlight if needed.

Focus on the posts, beams, joists, ledger board, stair stringers, and railing connections. These components carry the load. A deck may have weathered-looking boards but still be structurally strong, or it may look acceptable from above while hidden rot has weakened the framing below.

Probe suspicious wood with a screwdriver. Sound wood resists the tool; decayed wood feels soft, crumbles, or allows the screwdriver to sink in easily. Check areas where water tends to collect, especially around the base of posts, where boards meet the house, beneath planters, and under gaps clogged with leaves.

Pay close attention to the ledger board, which attaches the deck to the house. If it is loose, visibly rotted, improperly flashed, or secured with questionable fasteners, do not treat it as a minor repair. Ledger failure can cause a deck to pull away from the home, making professional evaluation the sensible next step.

Decide Whether Repair Is the Right Choice

Many old decks can be repaired safely when the damage is limited to a handful of boards, loose railings, worn stairs, corroded hardware, or isolated sections of framing. Repair is often the practical choice when the foundation, main supports, and house connection remain stable.

Replacement becomes more likely when rot affects multiple joists, beams, or posts; when the deck has widespread movement; or when its original construction does not meet current safety expectations. A patchwork of new boards over failing framing may improve appearance for a season, but it does not protect your family or your investment.

Age alone does not determine the answer. A well-maintained 20-year-old deck may need selective repairs, while a poorly built deck only a few years old may need substantial reconstruction. The condition of the structure, not the calendar, should guide the decision.

How to Repair an Old Deck Board by Board

If inspection confirms that the framing is solid, begin with the visible deck surface. Remove damaged boards rather than covering them with rugs, outdoor tiles, or another temporary fix. Those solutions can trap moisture and make decay worse.

Use a pry bar carefully to lift the damaged board, avoiding damage to the neighboring boards. If the board is face-screwed, remove the screws first. If old nails will not pull cleanly, cut the board into manageable sections and remove it piece by piece. Check the top edge of each joist before installing a replacement. If the joist has soft spots or deep splitting, repair or replace that framing member before laying a new board.

Match the replacement material to the existing deck when possible. Pressure-treated lumber is a common, budget-conscious option for wood decks, though it should be allowed to dry appropriately before staining. Composite boards can reduce future maintenance, but adding a few composite boards to an older wood deck may create noticeable differences in color, thickness, and movement.

Install new boards with exterior-rated deck screws, not interior screws or standard nails. Screws hold more securely and make future board replacement easier. Maintain consistent spacing between boards so rainwater and debris can pass through instead of sitting on the deck surface.

Repair Loose Boards and Protruding Fasteners

A loose board may only need new fasteners, provided the wood around the old screw holes is still solid. Remove lifted or rusted fasteners, then secure the board into sound wood with corrosion-resistant deck screws. If the board has split around several fasteners or feels soft, replacement is a better repair.

Do not simply hammer down popped nails and assume the problem is solved. They often work loose again as the wood expands and contracts. Protruding fasteners are a trip hazard and can snag bare feet, furniture, and pet paws.

Replace Weak Stair Components

Deck stairs deserve extra attention because they receive concentrated daily use. Replace cracked treads, loose handrails, and deteriorated stringers promptly. Stairs should feel firm underfoot, with consistent tread depth and no rocking at the bottom landing.

If the stair framing has shifted, the handrail is not securely connected, or the rise and run feel uneven, a larger repair may be needed. These details affect more than appearance. They directly influence fall risk, especially for children, guests, and aging family members.

Strengthen Railings, Posts, and Connections

Railings should not wobble when you push against them. A loose railing is one of the clearest signs that a deck needs attention, and tightening a few surface screws is not always enough. The railing posts need secure structural connections to the deck framing, not just attachment to the decking boards.

Inspect every post for rot near the bottom and at connection points. Check metal brackets, bolts, and hangers for corrosion. In Central Virginia’s humid climate, older hardware can rust significantly even when the surrounding wood still looks serviceable.

When replacing hardware, use connectors and fasteners rated for exterior use and compatible with pressure-treated lumber. Some metals corrode faster when paired with modern treated wood, so material compatibility matters. This is one area where the correct components and installation method are worth more than a quick cosmetic fix.

Address Water Before It Creates More Damage

Most deck deterioration begins with prolonged moisture. Repairing damaged boards without correcting water problems can lead to the same issues returning much sooner than expected.

Clear leaves, pine needles, and soil from gaps between boards and from the area under the deck. Make sure the ground slopes away from the home and that downspouts do not discharge beside posts or footings. Trim back shrubs and low tree branches that keep the deck shaded and wet after rain.

Check whether the ledger connection is properly flashed to direct water away from the house. Water infiltration at this location can damage both the deck and the home’s exterior wall. If you see staining, softness, or peeling siding near the ledger, have the area assessed before making surface repairs.

Clean, Seal, and Protect the Repaired Deck

Once repairs are complete, give the deck a proper cleaning. Use a deck cleaner suited to the material, and avoid aggressive pressure washing that can gouge wood fibers or force water into vulnerable areas. A garden hose, cleaner, scrub brush, and patient rinsing are often safer for older wood.

Let the deck dry fully before applying a water-repellent sealer or stain. Transparent sealers preserve a natural look but generally need more frequent maintenance. Semi-transparent stains offer more UV protection and help even out the appearance of old and new boards, though they still allow some wood grain to show through. Solid-color stains conceal more imperfections but can peel if surface preparation is poor.

Plan to inspect the deck at least once a year, ideally in spring before outdoor entertaining begins. Tighten hardware, clear debris, look for developing rot, and touch up protective finishes before small problems become major repairs.

When to Bring in a Professional

Some deck repairs are manageable for an experienced homeowner, but structural work is not the place to guess. Call a qualified contractor when posts, beams, joists, stairs, railings, or the ledger board show damage; when the deck is elevated; or when you are uncertain how far rot has spread. Local permitting and code requirements may also apply when structural components are replaced or redesigned.

A professional assessment can preserve the parts of a deck that are still in good condition while identifying repairs that should not be delayed. For homeowners in the greater Richmond area, Old Dominion Innovations can help evaluate whether a practical deck renovation will restore safe, comfortable use or whether replacement will provide better long-term value.

A repaired deck should feel solid when family and friends step outside, not like something everyone has to navigate carefully. Address the safety issues first, protect the wood from future moisture, and make each repair with the full structure in mind.

Bathroom Remodel Budgeting Guide for Richmond Homes

Bathroom Remodel Budgeting Guide for Richmond Homes

A bathroom can look like a modest project until the first wall opens. Behind a vanity or shower surround, homeowners may find aging plumbing, moisture damage, outdated wiring, or framing that needs attention before the new finishes can go in. A thoughtful bathroom remodel budgeting guide helps you prepare for those realities without losing sight of the room you want to enjoy every day.

For Richmond-area homeowners, the strongest remodeling budgets are not built around the lowest initial number. They are built around clear priorities, realistic product choices, qualified labor, and a plan for the unknowns that older homes can reveal. That approach protects both your investment and your peace of mind.

Start Your Bathroom Remodel Budgeting Guide With Priorities

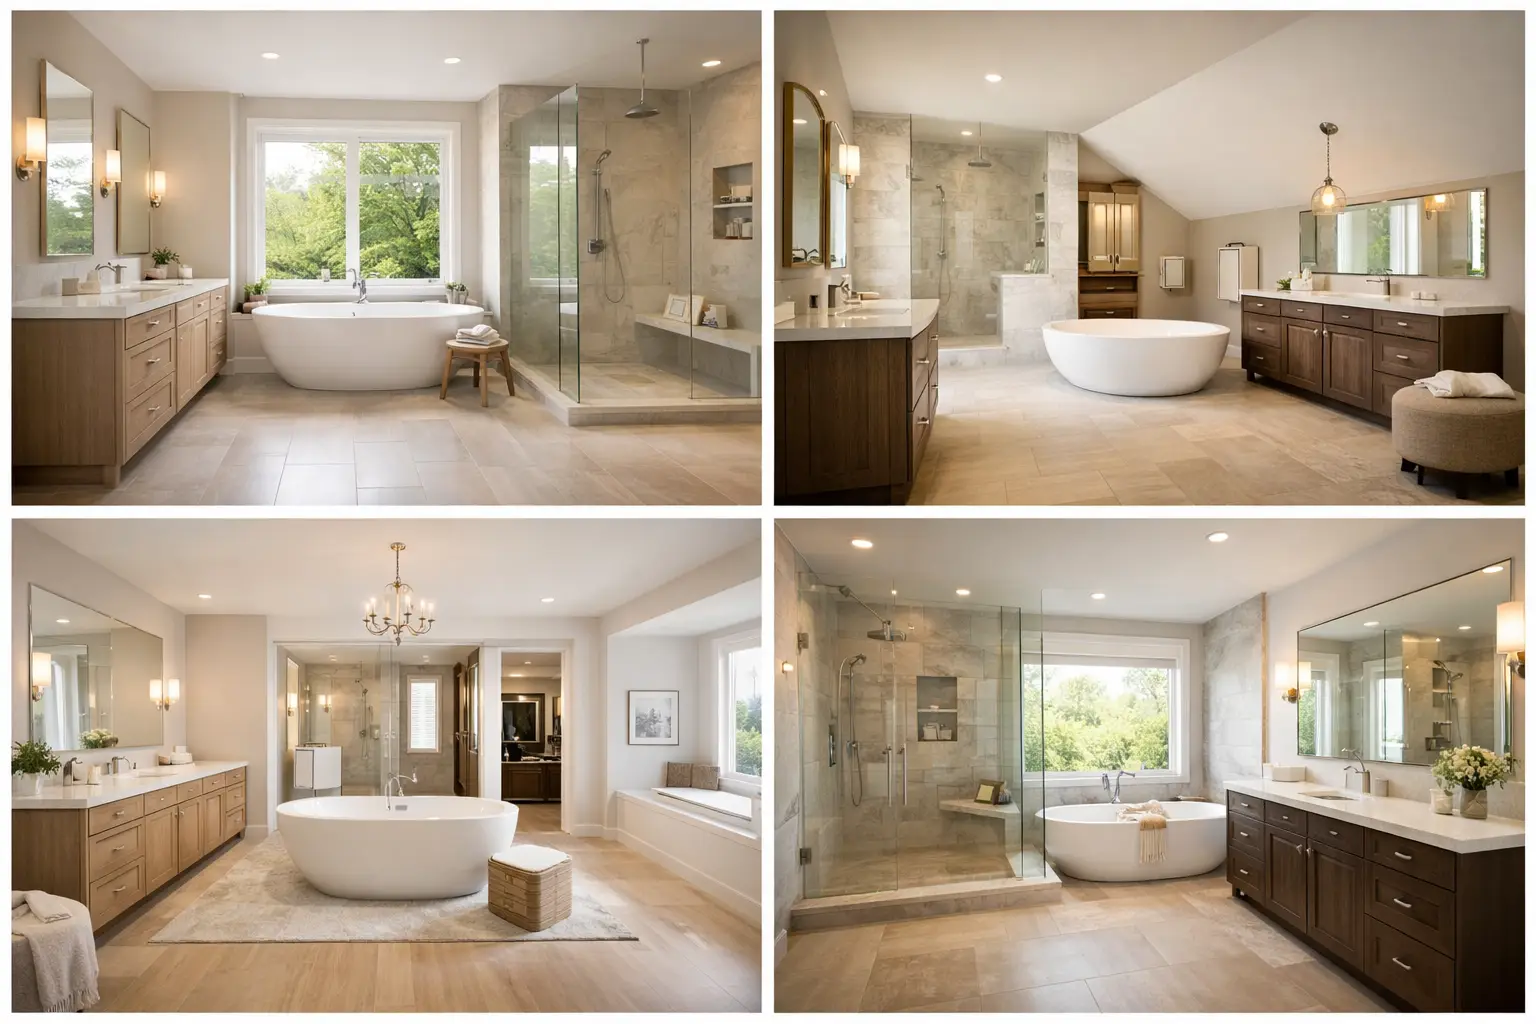
Before discussing tile patterns or faucet finishes, decide what the remodel must accomplish. A primary bathroom might need better storage, a larger shower, and finishes that support resale value. A hall bath may need durable materials that can handle children and guests. For an aging homeowner, the priority could be a low-threshold shower, grab bars, improved lighting, and room to move safely.

Write down your must-haves, nice-to-haves, and items you are willing to keep. This step keeps the budget from drifting as attractive options appear during selections. It also gives your contractor a clearer picture of where to invest and where a practical alternative makes sense.

A useful question is: what is not working in the room today? Poor ventilation, limited storage, slippery flooring, a cramped tub, or weak lighting are functional problems worth solving. A new mirror can wait if the shower is leaking or the layout creates a daily frustration.

Understand What Drives the Cost

Bathroom remodeling costs vary widely because bathrooms combine several skilled trades in a compact space. Demolition, plumbing, electrical work, waterproofing, tile installation, cabinetry, painting, and finish installation all need to work together. Moving one fixture can affect several of those categories at once.

Labor is often a significant part of the investment, particularly when the work involves custom tile, a curbless shower, structural changes, or moving plumbing lines. Quality installation matters because the details behind the walls – proper waterproofing, secure connections, ventilation, and electrical safety – are what help the finished bathroom perform well for years.

Material selections also have a wide range. A standard vanity and porcelain tile can create a handsome, durable room at a different price point than custom cabinetry, natural stone, specialty glass, or high-end plumbing fixtures. Neither approach is automatically right. The best selection is the one that fits your goals, expected use, and overall renovation plan.

The age and condition of the home matter, too. Many homes around Richmond, Henrico, Hanover, Mechanicsville, Ashland, and Glen Allen have character and solid construction, but older bathrooms can have surprises behind finished surfaces. The goal is not to assume a problem exists. It is to reserve room in the budget if an existing condition requires correction.

Layout changes have an outsized effect

Keeping the toilet, shower, and vanity in their current locations can simplify plumbing work. Changing the layout may improve the room dramatically, but it can require relocating supply lines, drains, electrical circuits, and sometimes ventilation. If layout is your top priority, budget for it from the beginning rather than treating it as a late upgrade.

This is where an in-home consultation is especially valuable. A professional can assess whether a proposed layout is practical, identify likely construction considerations, and offer alternatives that achieve much of the same benefit at a more comfortable investment level.

Build a Budget in Clear Categories

A remodeling budget should be more than one total number. Breaking it into categories makes decisions easier and helps you see where changes will have the biggest impact. Your project scope should account for design and planning, permits when required, demolition, construction labor, plumbing and electrical work, waterproofing, fixtures, cabinetry, countertops, flooring and wall finishes, lighting, ventilation, paint, and cleanup.

Do not overlook the less visible items. Shower waterproofing, a properly sized exhaust fan, GFCI protection, shutoff valves, trim pieces, and disposal costs may not be the most exciting line items, but they contribute to a safe, complete project. Skipping them to preserve room for a luxury finish can lead to disappointment later.

Selections should be discussed early. A budget based on a standard acrylic shower base and a stock vanity will change if you later choose a custom tiled shower, frameless glass, and furniture-style cabinetry. There is nothing wrong with upgrading, but the financial decision should be intentional.

For many homeowners, it helps to set an overall comfort range rather than a single fixed number. Share that range honestly with your contractor. An experienced remodeling team can shape options around it, explain the trade-offs, and help direct more of the investment toward the features that matter most to your household.

Keep a Contingency for What You Cannot See

A contingency is not an invitation for uncontrolled spending. It is a planned reserve for legitimate conditions discovered during construction. In a bathroom, those conditions may include hidden water damage, deteriorated subflooring, corroded pipes, inadequate wiring, mold remediation needs, or a wall that is not suitable for the feature you planned.

The right contingency amount depends on the home and the project scope. A newer home with a straightforward cosmetic update may call for less flexibility than a decades-old home receiving a full gut renovation. Ask your contractor what conditions are most likely to affect your particular project and how change decisions will be documented.

Clear communication is essential here. Homeowners should understand what is included in the original scope, what would qualify as an added condition, and when they will be asked to approve a change. A dependable contractor does not treat surprises as a reason to leave you guessing. They explain the issue, show the available options, and keep the next step clear.

Spend More Where Daily Use Demands It

Not every part of a bathroom needs to carry the same price tag. A well-balanced budget typically gives attention to the components that receive constant use or are difficult to replace later. Shower construction, waterproofing, plumbing connections, ventilation, lighting placement, and flooring are sensible places to focus on long-term value.

A vanity is another decision that depends on how the room is used. In a busy family bathroom, storage and durable surfaces may matter more than an elaborate cabinet style. In a small powder room, a compact vanity or pedestal sink may be the best way to preserve open floor space. In a primary bath, double sinks may be worthwhile only if the layout still allows comfortable circulation and usable storage.

Accessibility improvements deserve the same practical thinking. Reinforcing walls for future grab bars, choosing slip-resistant flooring, widening a doorway, or installing a handheld showerhead can make a bathroom safer without making it feel institutional. Some upgrades are easiest and most cost-effective to complete during a full remodel rather than after the room is finished.

Avoid False Savings That Create Bigger Problems

The least expensive proposal is not always the most affordable project. Compare scopes carefully, not just bottom-line numbers. One estimate may include demolition, permits, waterproofing, fixture installation, and finish work, while another may leave portions of the job unclear or excluded.

Be cautious about buying every item independently before the project is planned. Homeowners can sometimes find good values, but a fixture that does not fit the rough-in, a vanity that arrives damaged, or tile ordered without enough extra material can cause delays. Confirm dimensions, lead times, compatibility, and return policies before purchasing. Your contractor can help you avoid selections that look right online but create complications on site.

It is also wise to avoid making major additions after construction is underway unless they solve an important need. Late changes can affect labor scheduling, material orders, and surrounding finishes. The more decisions made before demolition, the more predictable the project usually becomes.

Choose a Contractor Who Can Explain the Numbers

A bathroom remodel requires more than skilled installation. It requires a team that respects your home, communicates reliably, and helps you make informed choices before work begins. Ask how the project will be managed, who will be in your home, how the work area will be protected, and how updates or changes will be handled.

For homeowners in the greater Richmond area, Old Dominion Innovations approaches bathroom renovations as a practical investment in comfort, safety, and everyday living. The right plan should feel personal to your household, not like a package built around someone else’s priorities.

A well-planned bathroom budget gives you permission to make decisions with confidence. Keep the conversation focused on how the space needs to work, leave room for the home to reveal what it needs, and choose workmanship that lets you enjoy the finished room without second-guessing what is behind the walls.

Whole Home Remodel Checklist for Richmond Homes

Whole Home Remodel Checklist for Richmond Homes

A whole-house renovation can feel exciting right up until the decisions begin stacking up: flooring, plumbing, permits, paint colors, temporary living arrangements, and a budget that needs to cover more than the visible finishes. A well-built whole home remodel checklist gives Richmond-area homeowners a practical way to make those decisions in the right order and avoid expensive changes once construction is underway.

The goal is not to have every detail decided on day one. It is to establish a clear plan, protect your investment, and give your contractor the information needed to keep the work moving responsibly.

Start With How You Want to Live in the Home

Before discussing cabinets, tile, or fixtures, define what is not working in your home now. An outdated kitchen may be part of the problem, but the larger issue might be poor traffic flow, limited storage, an inaccessible bathroom, or rooms that no longer fit a growing family.

Walk through the house at different times of day. Notice where people gather, where clutter collects, and which spaces are difficult to heat, cool, clean, or use safely. For homeowners planning to age in place, this is also the right time to identify trip hazards, narrow doorways, difficult stairs, and bathing areas that need better access.

Write down your priorities in three categories: must-haves, strong preferences, and nice-to-haves. This helps when a budget decision requires a trade-off. For example, relocating a load-bearing wall or plumbing line may be worth the expense if it solves a daily usability problem. On the other hand, a premium finish can often be selected later without changing the function of the space.

Build Your Whole Home Remodel Checklist Before Design Begins

A whole-home project works best when it is treated as one coordinated plan, even if construction will happen in phases. That approach helps prevent a newly finished room from being affected by later electrical, flooring, or structural work.

Your early checklist should cover these major decisions:

  • Define the rooms and exterior areas included in the remodel, such as bathrooms, kitchen, bedrooms, basement, deck, sunroom, additions, and entryways.
  • Identify functional upgrades, including storage, lighting, insulation, ventilation, accessibility features, and energy-efficient windows or doors.
  • Document known issues such as water damage, aging wiring, uneven floors, drainage concerns, or dated plumbing.
  • Set a target investment range and decide where flexibility exists if hidden conditions are found.
  • Establish a preferred completion window while recognizing that permits, material lead times, and inspections can affect the schedule.

Bring photographs, measurements, inspiration images, and a record of any past repairs to the initial consultation. A contractor can provide more useful guidance when they understand both the look you want and the conditions behind the walls.

Decide What Stays and What Changes

Many homeowners want to preserve the character of an older Richmond home while improving how it functions. That may mean keeping original woodwork, refinishing hardwood floors, or matching a new addition to the existing exterior. It may also mean accepting that some original elements are no longer safe or practical.

Be direct about what you are willing to change. Saving a wall, a window location, or an existing layout can reduce cost, but it can also limit options for storage, accessibility, and natural light. A good remodeling plan respects the home without forcing your family to keep living around its limitations.

Set a Budget That Accounts for the Full Project

The construction estimate is central, but it is not the only number to plan for. Whole-home remodels can involve design decisions, permit fees, product allowances, temporary storage, pet boarding, meals away from home, and unexpected repairs uncovered during demolition.

Set aside a contingency fund for conditions that cannot be fully confirmed before work begins. The appropriate amount depends on the age and condition of the house, the scope of structural or plumbing changes, and whether walls or floors will be opened. Older homes often deserve more room in the budget because prior repairs and concealed damage can create surprises.

Ask your contractor to explain what is included, what is excluded, and which selections are allowances rather than final prices. An allowance is useful early in planning, but it needs to reflect the quality level you actually expect. Choosing materials well above an allowance later can create avoidable budget pressure.

Spend Where Daily Use Matters Most

Not every upgrade deserves the same investment. Durable flooring, waterproofing, quality plumbing components, ventilation, cabinetry construction, and properly installed exterior details are often worthwhile places to prioritize. These choices affect comfort, maintenance, and long-term performance.

Decorative selections still matter, especially in kitchens and bathrooms, but they should not take funding away from work that protects the home. A beautiful shower tile installation is only as dependable as the waterproofing system behind it.

Confirm Scope, Permits, and Project Responsibilities

A full remodel commonly requires more coordination than homeowners expect. Electrical upgrades, plumbing alterations, structural changes, additions, decks, and accessibility modifications may each involve permits or inspections. Requirements vary by location and scope, including across Richmond, Henrico, Hanover, Mechanicsville, Ashland, and Glen Allen.

Before work starts, confirm who will handle permit applications, inspection scheduling, subcontractor coordination, material ordering, and site protection. You should also understand the approval process for changes. If an issue is uncovered or you request an adjustment, get the cost and schedule impact documented before the work proceeds whenever possible.

This is one reason homeowners often benefit from working with a full-service remodeling contractor instead of trying to manage separate trades themselves. Old Dominion Innovations helps homeowners coordinate broad renovation needs through one accountable team, with communication centered on the plan, the home, and the family living in it.

Make Selections Early Enough to Protect the Schedule

A project can be delayed by a single missing item: a backordered vanity, a specialty window, a discontinued tile, or hardware that does not fit the selected cabinetry. Finalize long-lead items before demolition whenever possible, especially cabinets, appliances, windows, doors, custom shower glass, and specialty fixtures.

For finishes, create a simple selection record with product names, colors, quantities, model numbers, and approval dates. This is particularly helpful when several rooms are being renovated at once. It reduces confusion and makes it easier to confirm that the materials delivered match the materials approved.

Do not select products based on appearance alone. Consider maintenance, durability, cleaning needs, and how the material works with children, pets, mobility needs, and Virginia humidity. A surface that looks excellent in a showroom may not be the right fit for a busy household.

Plan for Living Through Construction

The daily disruption of a whole-home remodel deserves as much attention as the finished design. If the kitchen, primary bathroom, or major living areas will be unavailable, decide in advance whether you will remain in the home, set up a temporary living zone, or stay elsewhere during the most disruptive phase.

If you remain at home, agree on practical expectations with your contractor. Discuss work hours, access points, parking, dust containment, debris removal, restroom arrangements for crews, and how pets and children will be kept away from work areas. Protect valuables and move fragile items well before demolition begins.

For phased projects, start with work that affects the entire house, such as structural repairs, electrical upgrades, plumbing, HVAC changes, or window replacement. Then move into individual rooms. This sequence can limit rework and help preserve finished spaces.

Review Progress Without Micromanaging

Regular communication prevents small questions from becoming major frustrations. Establish how often you will receive updates, who your primary point of contact will be, and how decisions will be documented. Keep a running list of questions, but separate urgent safety or access concerns from items that can wait for the next scheduled check-in.

As rooms near completion, review workmanship carefully in good lighting. Check that doors operate properly, fixtures are secure, outlets and switches work, paint coverage is consistent, and finishes match approved selections. A final walkthrough should also cover warranties, care instructions, remaining punch-list items, and how any post-project concerns will be handled.

A thoughtful remodel is not simply a collection of new rooms. It is a chance to make your home easier to use, safer for the people you love, and better suited to the years ahead. Start with the decisions that affect daily life most, then let the finishes bring that plan to life.

10 Best Accessibility Upgrades for Home

10 Best Accessibility Upgrades for Home

A front step that felt harmless ten years ago can become a daily obstacle faster than most homeowners expect. The best accessibility upgrades home owners choose are usually not about making a space look medical or institutional. They are about making everyday life safer, easier, and more comfortable without giving up the style and value of the home.

For many families in Richmond, Henrico, Hanover, Mechanicsville, Ashland, and Glen Allen, accessibility planning starts with one clear goal: stay in the home you love and make it work better for the way you live now. Sometimes that means preparing for aging in place. Sometimes it means helping a parent move in, supporting recovery after surgery, or simply reducing fall risks before they become emergencies. The smartest upgrades do all of that while still feeling like a thoughtful renovation, not a temporary fix.

What makes the best accessibility upgrades home owners can choose?

The right upgrade depends on the person using the space, the layout of the house, and the budget. A wide doorway may matter more than a grab bar in one home. In another, a safer bathroom is the top priority because that is where slips and falls are most likely.

Good accessibility design is practical first. It should improve movement, reduce strain, and make routine tasks less frustrating. It should also fit the home visually. Most homeowners are not looking for a patchwork of add-ons. They want improvements that feel intentional and well built.

That is why consultation matters. A contractor who understands remodeling and day-to-day livability can help separate what sounds useful from what will actually improve life in your house.

1. Zero-threshold showers

If one room deserves careful accessibility planning, it is the bathroom. A zero-threshold shower removes the curb at the entry, which makes stepping in easier and safer. It can also allow access for a walker or wheelchair, depending on the layout.

This upgrade works especially well when paired with slip-resistant flooring, a handheld showerhead, and built-in seating. The result is not only safer but easier to use for nearly everyone in the home. It also tends to look cleaner and more modern than a traditional tub-shower combo.

The trade-off is that proper drainage and waterproofing have to be done correctly. This is not a place for shortcuts. A well-executed shower remodel protects the home from moisture problems while creating a more functional daily routine.

2. Grab bars that look like they belong

Grab bars are one of the simplest and most effective accessibility upgrades, but they are often installed too late or installed poorly. When they are anchored correctly and placed where support is actually needed, they add real security in showers, near toilets, and along transition points.

Today, homeowners have better design options than the old stainless institutional look many people still picture. Finished bars can blend with bathroom fixtures and feel like part of the room rather than a warning sign.

Placement matters more than quantity. One well-positioned grab bar can do more good than several installed without a plan.

3. Wider doorways and better clearance

Narrow doorways can make a home difficult to navigate long before a wheelchair is involved. Walkers, canes, crutches, and even carrying laundry or helping a family member through a room all become easier when door openings are widened.

This is one of the best accessibility upgrades for home layouts that feel tight or dated. It can improve traffic flow and make rooms feel more open. In some remodels, widening a doorway is straightforward. In others, wall structure, trim details, or plumbing and electrical lines can complicate the work.

That is where experienced planning pays off. A homeowner needs to know not just what is possible, but what makes sense for the overall renovation.

4. Entryways without steps

The front door, garage entry, and back door are common problem areas. If getting in and out of the house requires managing steps, uneven surfaces, or narrow landings, daily life gets harder in every season.

A no-step entrance or a carefully designed ramp can make a dramatic difference. In many cases, the best result is not a temporary metal ramp but a permanent entry solution that looks integrated with the home. That might include adjusted grading, wider walkways, improved railings, and better lighting.

It depends on the property. Some homes have enough space for a gentle approach. Others require more creative structural changes. Either way, safety and appearance should be planned together.

5. Comfort-height toilets and smarter bathroom layouts

A toilet that sits slightly higher can reduce strain on the knees and hips. On its own, that may sound minor, but small improvements often have the biggest daily impact. The same is true for giving the toilet area enough surrounding space for easier transfers and movement.

Bathroom accessibility is rarely about one product. It is about how the room works as a whole. If a vanity crowds the path, the floor gets slippery, and the shower entry is awkward, replacing one fixture will not solve the real problem.

A full bathroom remodel can often create better function without expanding the footprint. Reworking the layout is sometimes more valuable than adding square footage.

6. Non-slip flooring throughout key areas

Flooring affects confidence more than most homeowners realize. Slick tile, uneven transitions, thick rugs, and worn thresholds create constant hazards, especially for older adults.

The best accessibility upgrades home owners invest in often include flooring changes in bathrooms, kitchens, hallways, and entries. The goal is stable footing and smooth movement from room to room. That may mean textured tile, low-pile surfaces, or simply reducing abrupt height differences between materials.

This is also an area where style and function can work well together. Homeowners do not have to choose between a safe floor and an attractive one. They just need materials selected with daily use in mind.

7. Better lighting where it counts

Poor lighting turns small obstacles into big ones. A hallway that feels dim at night, a shadowed stair landing, or a bathroom vanity with uneven light can increase risk for falls and make routine tasks harder.

Accessibility-focused lighting is not only about brightness. It is about placement, glare control, switch access, and consistency. Under-cabinet lighting, brighter overhead fixtures, illuminated pathways, and easy-to-reach switches can all make a home feel easier to navigate.

For some households, motion-sensor lighting is worth considering, especially in bathrooms and hallways used at night. For others, a simple lighting redesign provides enough improvement without adding extra systems.

8. Lever handles and easy-use hardware

Round doorknobs and tight faucet controls can become frustrating with arthritis, reduced grip strength, or temporary injury. Lever-style door handles and easier-to-operate plumbing fixtures are relatively small changes, but they remove repeated daily strain.

These upgrades are often overlooked because they do not feel major. Still, they are part of what makes a home usable over time. If a person struggles with a handle or knob several times a day, the annoyance adds up quickly.

When included as part of a broader renovation, these details help the finished space feel truly thought through.

9. Main-level living improvements

Stairs are one of the biggest barriers in many homes. If bedrooms, showers, and laundry are spread across different levels, accessibility can become a larger renovation conversation.

Sometimes the best answer is not a stair lift or a quick fix. It may be a first-floor bathroom conversion, a bedroom addition, or repurposing existing space to support main-level living. These are larger investments, but they can be the right long-term choice for families who want to remain in their home for years to come.

This is where a full-service remodeling approach matters. Accessibility is not always one room. Sometimes it is a better plan for how the whole house functions.

10. Railings, stairs, and safer transitions

Not every accessibility project involves removing stairs. In many homes, the better approach is making them safer. Strong railings on both sides, improved tread visibility, corrected rise heights, and better landings can all reduce risk.

The same goes for transitions between rooms, exterior thresholds, and changes in flooring. If a walker catches on a raised edge or a homeowner hesitates every time they step through a doorway, that is a problem worth fixing.

These improvements may not be the most noticeable part of a renovation, but they often deliver immediate peace of mind.

How to prioritize the best accessibility upgrades home needs first

Most homeowners do not tackle everything at once. The better approach is to start with the spaces that carry the highest risk or the greatest day-to-day frustration. For many people, that is the bathroom and the main entry. For others, it is lighting, flooring, or a first-floor living arrangement.

It also helps to think beyond the current moment. A home should not only work for today. It should support the next five to ten years if possible. That does not mean overbuilding or overspending. It means making smart choices now so the house continues to serve the family well.

At Old Dominion Innovations, that practical mindset is central to good remodeling. Homeowners need honest guidance, quality workmanship, and solutions that respect both their budget and the way they actually live.

The best accessibility upgrade is the one that removes a daily obstacle before it becomes a serious setback, and the right time to plan for that is usually earlier than people think.

Remodeling vs Renovating: What’s the Difference?

Remodeling vs Renovating: What’s the Difference?

You walk into your bathroom and know something has to change. The tile is dated, the layout feels cramped, and the vanity never gave you enough storage. At that point, the question of remodeling vs renovating stops being a wording issue and starts affecting your budget, timeline, and what kind of contractor you need.

Homeowners often use both terms interchangeably, and that is completely understandable. In everyday conversation, they can sound like the same thing. But when you are planning real work on your home, the difference matters. It can influence permits, design decisions, costs, and how disruptive the project will be to your daily life.

Remodeling vs Renovating: The Core Difference

The simplest way to think about it is this: renovating means improving or restoring what is already there, while remodeling means changing the space itself.

A renovation updates an existing room without significantly altering its layout or structure. You might replace flooring, install new cabinets in the same footprint, update old fixtures, repaint walls, or swap out worn materials for newer finishes. The room still functions in roughly the same way, but it looks better, feels fresher, and often works better for everyday use.

A remodel goes further. It changes the design, structure, or purpose of a space. That could mean moving plumbing, taking down a wall, expanding a shower, reworking a kitchen layout, building an addition, or converting a screened porch into a sunroom. Remodeling is about reshaping how the space lives, not just refreshing how it looks.

That distinction may seem small at first, but it becomes very clear once construction begins. If your project requires major layout changes, structural work, or system modifications, you are likely remodeling.

When Renovating Makes More Sense

Renovation is often the right fit when the bones of the space are still good, but the finishes or features are outdated. Many Richmond-area homeowners fall into this category. They do not necessarily need to move walls or redesign the entire room. They just need their home to feel cleaner, newer, safer, or more usable.

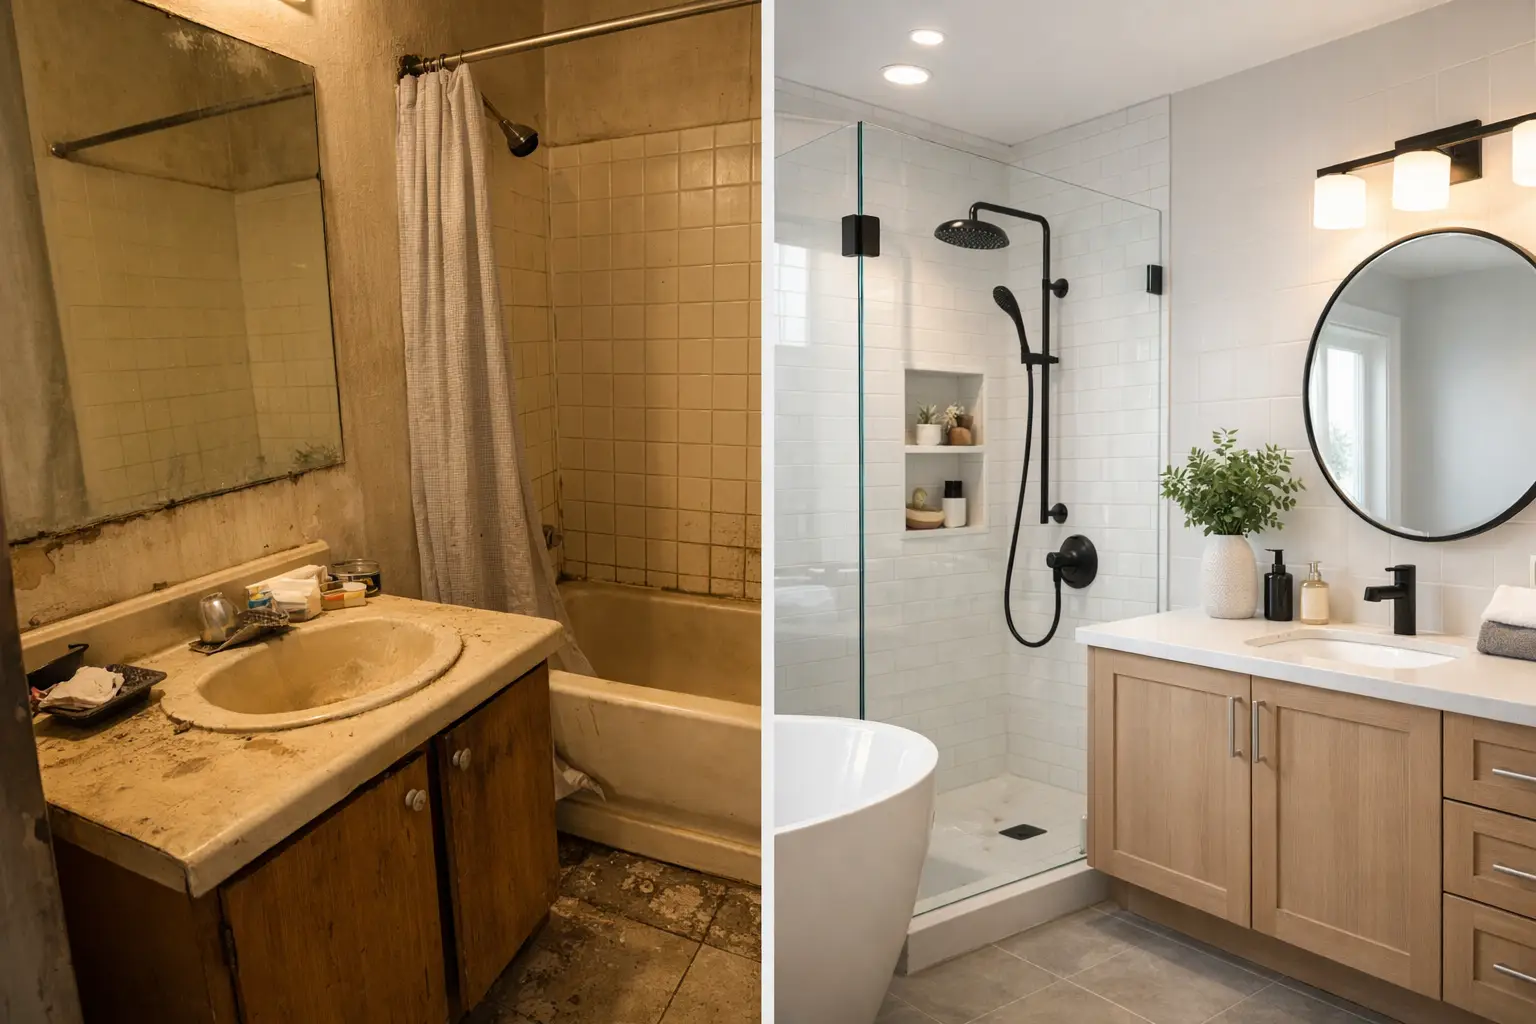
A bathroom is a good example. If the current layout works but the fixtures are worn, the tile is aging, and the lighting is poor, renovation may be enough. New flooring, an updated vanity, better lighting, fresh paint, and modern plumbing fixtures can transform the room without changing its footprint.

The same idea applies to decks, flooring, older trim work, and many cosmetic upgrades. Renovation usually creates less disruption than a full remodel, and in many cases it can be more budget-conscious because you are not rebuilding core elements of the space.

That said, renovation is not always the cheaper path in every situation. If you keep patching around an inefficient layout or failing materials, you can spend money updating a room that still does not truly meet your needs.

When Remodeling Is the Better Investment

Remodeling becomes the better choice when the problem is not just age or appearance. It is function.

If your kitchen feels closed off from the rest of the house, a cosmetic update may not solve the issue. If a bathroom is too tight for safe aging-in-place use, replacing the vanity and repainting the walls will not create the clearance you need. If your family needs more living space, no amount of fresh finishes will make a small footprint act like an addition.

This is where remodeling earns its value. It allows you to solve the actual problem instead of just improving the surface.

For example, widening a bathroom entrance, installing a curbless shower, or reworking the layout for better accessibility is remodeling. Building a sunroom to create year-round living space is remodeling. Expanding a deck to better support entertaining and family use is often remodeling too, especially if framing, structural elements, or footprint changes are involved.

For homeowners planning to stay in their homes for years, remodeling can be the smarter long-term move. It addresses how the home functions today and how it needs to function later.

Cost Differences Between Renovating and Remodeling

In most cases, remodeling costs more than renovating. There is a simple reason for that: changing structure, layout, plumbing, electrical, or square footage takes more labor, more coordination, and often more materials.

A renovation tends to be more predictable because the scope is tighter. You are improving known surfaces and components rather than opening up walls and changing the framework of the space. That usually means fewer surprises and a clearer budget range.

A remodel can introduce more variables. Once walls are opened, older homes may reveal hidden issues such as outdated wiring, water damage, uneven framing, or code-related corrections. None of that means remodeling is a bad idea. It just means it requires planning, contingency room in the budget, and a contractor who communicates clearly.

For many homeowners, the real question is not which costs less. It is which option gives the better return for the way they live. Spending less on a renovation is not necessarily the better value if the room still does not work for your family.

Permits, Design, and Project Complexity

One of the biggest practical differences in remodeling vs renovating is what happens behind the scenes.

Renovations may require fewer approvals if the work is primarily cosmetic. Depending on the project, replacing finishes, cabinets, fixtures, or flooring may not trigger the same level of permitting as structural changes. But every municipality has its own rules, and homeowners should never assume permits are optional.

Remodeling often involves more formal planning. If you are moving walls, altering plumbing or electrical systems, changing a deck structure, building an addition, or making major accessibility modifications, permits and inspections are commonly part of the process. Design considerations also become more important because layout, flow, load-bearing elements, and code compliance all come into play.

This is where working with an experienced full-service contractor matters. A project that looks straightforward on paper can become much more complicated if trades are not coordinated well or if scope decisions are made too late.

How to Choose the Right Approach for Your Home

The best way to decide between renovating and remodeling is to ask a more useful question than, “What do I want this room to look like?” Ask, “What do I need this space to do better?”

If the room already functions well and your main concern is appearance, comfort, or replacing worn materials, renovation may be the right path. If the room frustrates you daily because of traffic flow, storage, accessibility, size, or layout, remodeling is more likely to solve the real issue.

It also helps to think about timing. Are you preparing to sell in the next few years, or are you improving your forever home? A renovation can be a smart move for presentation and marketability. A remodel may make more sense when your priority is long-term livability.

And then there is the disruption factor. Some homeowners are ready for a more involved project because they know the payoff will be worth it. Others need to limit downtime and protect day-to-day routines. Neither approach is wrong. It depends on your goals, your budget, and your tolerance for construction inside the home.

Why Homeowners Get Stuck Between the Two

Many projects sit in the gray area between renovation and remodeling. That is normal.

A bathroom update might begin as a renovation, but once you decide to enlarge the shower, improve storage, and create better clearance, it becomes a remodel. A deck project might start with replacing boards and railings, then shift into a redesign once you realize the current layout does not support how you actually use the space.

That is why consultation matters so much at the beginning. Homeowners do not always need a contractor to tell them what terms to use. They need someone to listen carefully, assess the home honestly, and recommend the level of work that fits the goal without overselling the project.

For homeowners in Richmond, Henrico, Hanover, Mechanicsville, Ashland, and Glen Allen, that local, hands-on guidance can make the difference between a project that looks better for a short time and one that truly improves everyday living.

The Right Choice Is the One That Solves the Real Problem

There is no prize for choosing renovation over remodeling, or the other way around. The better project is the one that matches the condition of the home, respects your budget, and improves the way you live in the space.

A good contractor will help you sort that out clearly. Sometimes the smartest move is a focused renovation that refreshes and protects your investment. Other times, a remodel is the more practical answer because it corrects the layout, adds function, or prepares the home for the future. Old Dominion Innovations works with homeowners through that decision process every day, with an emphasis on practical improvements that feel good to live with long after the work is done.

If you are weighing your options, start with the problem you want solved, not the label. The right plan usually becomes much clearer from there.

Sunroom vs Home Addition: Which Fits Best?

Sunroom vs Home Addition: Which Fits Best?

When a house starts feeling tight, most homeowners are not looking for more construction. They are looking for more breathing room. That is why the question of sunroom vs home addition comes up so often. Both can give you extra space, but they solve very different problems, and choosing the right one can save you money, frustration, and a remodel that does not match how you actually live.

In the Richmond area, this decision often comes down to a few practical questions. Do you want year-round living space or a bright spot to relax in? Are you trying to raise long-term home value, or create a more enjoyable everyday space without taking on a full-scale build? The right answer depends less on trends and more on how your family uses the home now.

Sunroom vs Home Addition: The Core Difference

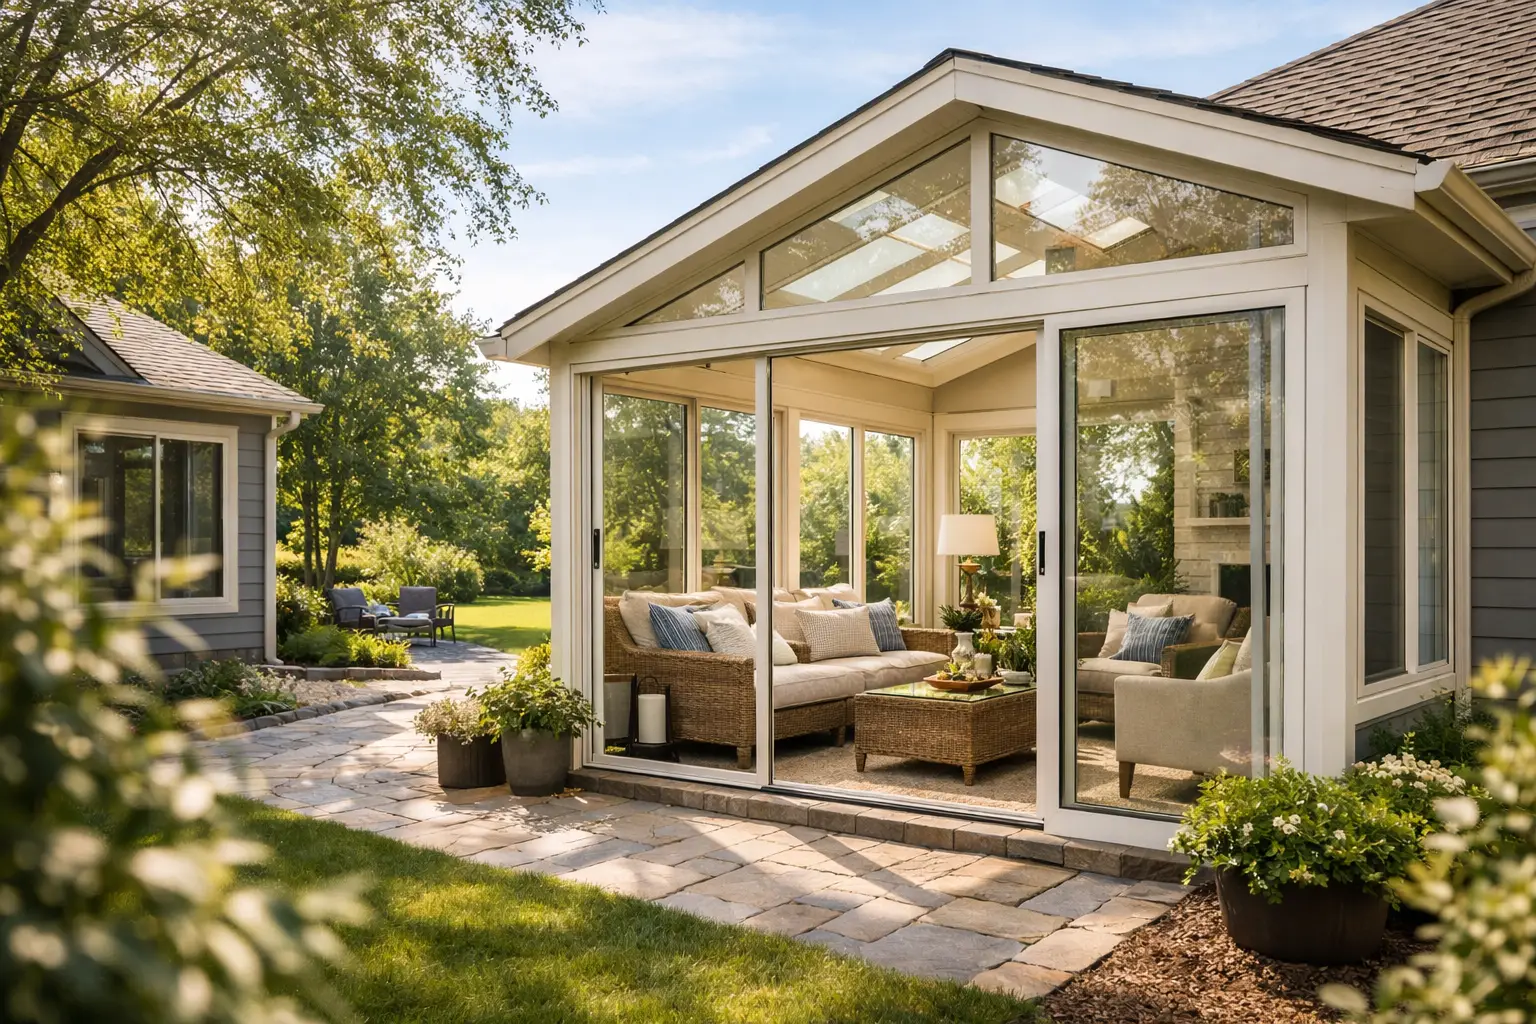
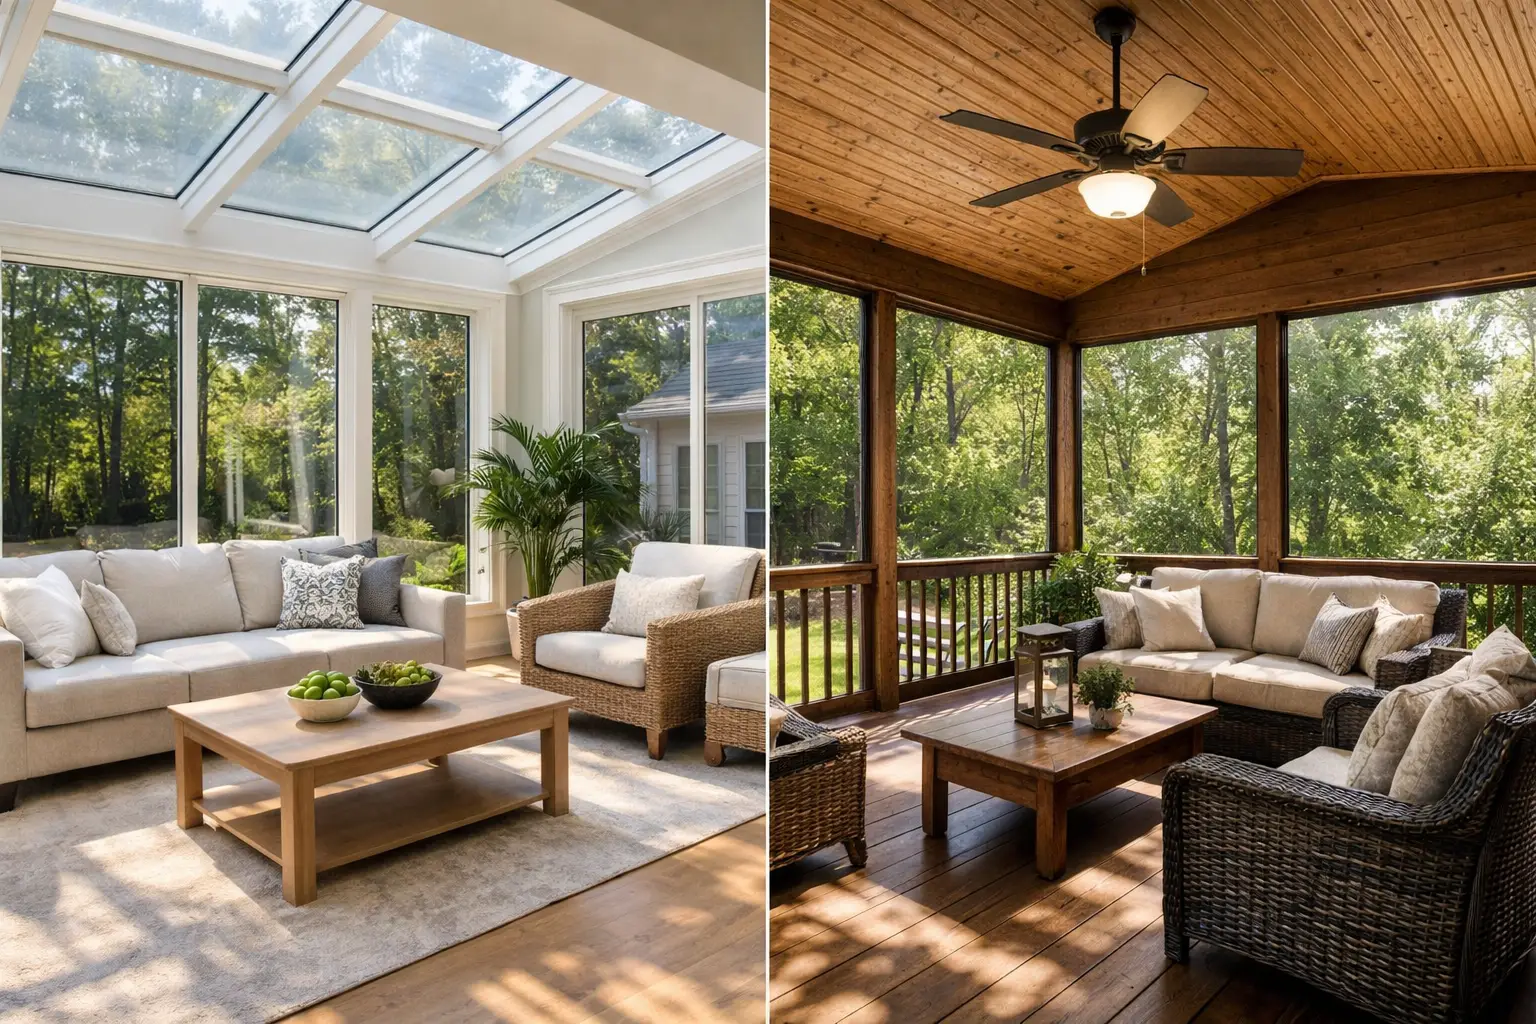
A sunroom is typically designed to bring in natural light and create a comfortable connection to the outdoors. It often has large windows, lighter framing requirements than a full addition, and a more casual purpose. Many homeowners use sunrooms as sitting rooms, reading spaces, plant rooms, breakfast areas, or a place to enjoy the backyard without dealing with heat, bugs, or rain.

A home addition is a broader category. It is usually built as a true extension of the house, with the same level of insulation, HVAC integration, electrical planning, and structural work you would expect in any primary living area. A home addition can become a bedroom, larger kitchen, family room, in-law suite, office, or expanded bathroom.

That difference matters. A sunroom usually adds lifestyle space. A home addition usually adds core living space.

When a Sunroom Makes More Sense

If your goal is to make the house feel more open, brighter, and more enjoyable without changing the entire floor plan, a sunroom can be an excellent fit. It gives you usable square footage while keeping the project more focused than a full addition.

For many families, a sunroom fills the gap between inside and outside living. It works especially well if you already like your home’s layout but feel like you are missing one flexible gathering space. It can become the room where morning coffee happens, where guests naturally drift during get-togethers, or where you unwind at the end of the day.

A sunroom may also make sense if budget is a major factor. In many cases, it is less expensive than a conventional addition because the project scope is narrower. That said, there is a wide range. A simple seasonal room is very different from a four-season sunroom with insulation, heating and cooling, upgraded windows, and finishes that closely match the main house.

The key is being honest about expectations. If you want a bright retreat with a distinct feel, a sunroom often delivers that beautifully. If you need a room that functions exactly like the rest of your home in every season, the design and build specifications need to reflect that from the beginning.

When a Home Addition Is the Better Investment

A home addition is usually the better choice when the space needs to solve a real household problem. Maybe your family needs another bedroom. Maybe working from home has made a dedicated office non-negotiable. Maybe an aging parent needs a first-floor suite, or your current kitchen is simply too cramped for daily life.

In those cases, a sunroom may feel helpful at first but still leave the original problem unsolved. A home addition gives you more freedom to create a room with a clear purpose and full integration into the home. It can blend more naturally with existing architecture, support plumbing if needed, and serve as conditioned living space all year.

This is often where resale value becomes part of the conversation. While every project should first serve the homeowner living there now, a properly planned addition can have stronger appeal when it adds practical square footage buyers recognize immediately. Extra bedrooms, expanded living areas, and functional suite space tend to be easier for future buyers to value than a room that reads as optional.

Cost Differences and What Drives Them

Homeowners often ask for a simple price comparison between sunroom vs home addition, but the true answer is that cost depends on complexity.

A sunroom can be more budget-friendly, especially if it is not carrying the same structural and mechanical demands as a full addition. Less extensive foundation work, simpler finishes, and a narrower use case can all help control cost. But once you move toward a four-season build with strong insulation, energy-efficient windows, electrical upgrades, and HVAC connections, the gap can narrow.

A home addition usually costs more because it asks more of the project. There may be deeper foundation work, roofline changes, permits with broader scope, more insulation, plumbing, HVAC extension, and interior finish work that must match the existing house closely. It is not just about building outward. It is about making the new space feel like it always belonged there.

That is why the best budgeting conversations start with function, not square footage alone. A smaller project with difficult tie-ins can cost more than a larger, simpler one. An experienced contractor should walk you through what is driving price so you are comparing real value, not just the headline number.

Comfort, Energy Efficiency, and Year-Round Use

This is one of the biggest decision points.

If you are considering a sunroom, ask yourself how often you want to use it in January and August. Virginia weather brings both humid summers and cold winter stretches, so comfort matters. A well-built four-season sunroom can be comfortable year-round, but that takes proper insulation, quality windows, and a heating and cooling plan that is sized for the room.

A home addition usually has an easier time delivering consistent comfort because it is designed from the start as standard living space. The insulation levels, wall construction, and HVAC integration are generally more aligned with the rest of the home.

Neither option should be approached casually. A beautiful room that is too hot in summer or too cold in winter becomes expensive square footage you avoid using. Good design protects against that.

Permits, Layout, and Property Limitations

Not every lot or home layout supports both options equally. Setback requirements, lot coverage rules, foundation conditions, roof design, drainage, and access for construction can all affect what is realistic.

Sometimes a sunroom is the cleaner fit because it can attach to the back of the house with less disruption. Other times, a full addition makes more sense because the home already needs layout changes and the project can solve several issues at once.

Permitting also matters. A fully conditioned addition with plumbing or major structural changes usually involves more extensive review than a simpler room build. That does not mean it is the wrong choice. It just means planning needs to be thorough. Homeowners are usually best served when these constraints are identified early, before they get attached to a design that may not fit the property.

Which Option Adds More Value to Daily Life?

This is where the decision becomes personal.

If your family already has enough bedrooms and functional living areas, a sunroom can dramatically improve how the home feels. Natural light changes the mood of a house. It creates a space that feels calm, open, and connected to the outdoors. For many homeowners, that quality-of-life improvement is worth every dollar.

If the home is missing necessary function, a home addition often brings more lasting value. It reduces pressure on the existing layout and supports the way your household actually operates. There is a practical relief that comes with having the room you genuinely need instead of trying to make the current footprint work harder than it can.

At Old Dominion Innovations, we often find that the best projects start with a simple question: what problem are you trying to solve? Once that answer is clear, the design path usually becomes much easier.

How to Choose Between Sunroom vs Home Addition

If you are still deciding, think about the room in plain terms. Are you creating a destination space, or are you fixing a shortage of essential living space? Do you want light, views, and flexibility, or do you need a room with a job to do every single day?

A sunroom is often the right answer when you want to enhance the way you enjoy your home. A home addition is often the right answer when the house needs to function differently than it does now.

Both can be smart investments when they are planned well. Both can be disappointing if they are chosen for the wrong reason. The right project is the one that respects your budget, fits your property, and supports the life happening inside your home.

Before you commit, take the time to picture how the space will be used on an ordinary Tuesday, not just during holidays or when guests come over. That is usually where the best decision reveals itself.

When Replace Deck Boards on Your Deck

When Replace Deck Boards on Your Deck

A deck can look “mostly fine” right up until the moment a board gives under your foot, catches a shoe, or starts holding water after every storm. If you are wondering when replace deck boards becomes the smarter move, the answer usually comes down to safety, moisture damage, and how widespread the wear has become.

For many Richmond-area homeowners, decks take a real beating. Summer heat, humidity, heavy rain, leaf buildup, and years of foot traffic all work against exposed wood. A few aging boards do not always mean your whole deck is failing, but they do deserve attention before a small repair turns into a much larger renovation.

When replace deck boards is the right call

The clearest sign is rot. If a board feels soft under pressure, flakes apart around fasteners, or can be penetrated easily with a screwdriver, that board is past the point of cosmetic improvement. Staining or sealing will not reverse rot once moisture has broken down the wood fibers.

Warping is another common issue. Boards that cup, twist, or lift at the edges create tripping hazards and can place uneven stress on the fasteners. One warped board may be a simple replacement. Several warped boards in the same area can point to bigger moisture or ventilation issues below the deck surface.

Cracking also matters, but context matters too. Small surface checks from normal weathering are common in wood decks and are not always a structural problem. Deep cracks that run through the board, especially near the ends or around screws and nails, are a different story. Those boards are weaker, less secure, and more likely to split further with seasonal movement.

Loose fasteners are worth watching. If screws no longer hold because the surrounding wood is deteriorating, replacing the fastener alone will not solve the problem. The board itself may no longer have enough strength to stay anchored safely.

Then there is persistent water retention. Deck boards should shed water reasonably well. If certain boards stay wet much longer than the rest, feel spongy, or show dark staining that keeps returning, moisture may already be trapped inside. In Virginia’s climate, that is often the beginning of a faster decline.

Signs your deck needs more than a few new boards

Homeowners often hope the problem is limited to the surface, and sometimes it is. But if you are trying to judge when replace deck boards applies to a handful of boards versus the entire deck surface, look for patterns instead of isolated damage.

If deterioration is clustered in high-exposure areas, such as stairs, around rail openings, or in spots with poor drainage, selective replacement may still make sense. If boards throughout the deck are cracking, softening, or becoming uneven, it may be more cost-effective to replace all decking at once.

Age is part of the equation. An older wood deck with widespread weathering, repeated repairs, and inconsistent board condition often reaches a point where piecemeal fixes stop being practical. You may save money in the short term by replacing a few boards, but if the rest are close behind, that repair can become an expensive stopgap.

The framing underneath matters just as much. If deck boards are failing but the joists and structural framing are sound, resurfacing the deck can be a very sensible option. If the substructure shows rot, movement, or improper spacing, replacing only the boards will not solve the real problem.

What deck board damage looks like in real life

Some signs are easy to miss because they develop gradually. A board that has become slightly springy may not stand out until you compare it to the firm feel of the surrounding deck. A raised edge may seem minor until someone catches a sandal on it. A dark patch may look like dirt when it is actually moisture damage working deeper into the wood.

Stairs deserve extra attention. Because they handle concentrated foot traffic and often stay damp longer, stair treads can wear out faster than the main deck surface. The same is true near door thresholds, grill areas, planters, and places where leaves or debris tend to collect.

Railing posts and the boards around them also deserve a close look. If the decking around a post is soft or split, that can affect more than appearance. It can compromise stability where people naturally place their weight.

Repair or replace? It depends on the extent

There is no honest one-size-fits-all answer here. Some decks truly need only a few new boards, a better fastening method, and a fresh protective finish. Others have reached the stage where replacing isolated boards creates a patchwork result without addressing overall wear.

If fewer than a small section of boards are damaged and the rest of the deck is in good shape, targeted replacement is often the right move. It preserves more of the original deck and keeps costs under control. This is especially true when the replacement boards can be integrated cleanly and the color variation will not be too noticeable.

If the deck has many damaged boards, multiple prior repairs, or major visual inconsistency, a larger resurfacing project may give you a better long-term result. Homeowners who are already thinking about updating the look of the deck often find that this is the point where function and appearance line up.

Why timing matters

Waiting too long rarely saves money with exterior wood. A bad board does not stay isolated forever. Water gets into cracks. Fasteners loosen further. Adjacent boards start absorbing more moisture. In some cases, deterioration spreads to joists or attachment points that are much more expensive to address than the decking itself.

There is also the safety side. A deck is not just a visual feature. It is a living space for kids, guests, pets, and everyday use. When boards become unstable, the risk is not theoretical. Replacing them before failure is always better than reacting after someone gets hurt.

Seasonal timing can help too. If you notice damage in late winter or early spring, that is a good time to plan repairs before heavy summer use begins. Fall can also be a smart time to address issues after a season of wear and before winter moisture settles in.

Materials make a difference

If you are replacing boards, it is worth thinking beyond a like-for-like swap. Pressure-treated wood remains a practical option for many homeowners and can perform well when installed correctly and maintained. Composite decking reduces ongoing maintenance and can be a strong fit for homeowners who want a longer-lasting surface with less upkeep.

The right choice depends on your budget, the condition of the framing, and your goals for the space. Sometimes replacing damaged wood boards with new wood is the most straightforward solution. In other cases, resurfacing with composite makes more sense because it reduces future maintenance and refreshes the deck’s overall look.

A good contractor will talk through those trade-offs clearly. The cheapest immediate option is not always the best value over time, especially if you plan to stay in the home for years.

What a professional inspection can tell you

A deck inspection should go beyond the top boards. Surface damage is only one part of the picture. The condition of joists, ledger attachment, stair framing, rail connections, spacing, drainage, and fasteners all affect whether board replacement is enough.

That is where experienced, hands-on evaluation matters. At Old Dominion Innovations, deck conversations with homeowners often start with one concern and uncover a more practical path forward, whether that means replacing a few unsafe boards or planning a broader renovation that protects the investment better.

For homeowners in Richmond, Henrico, Hanover, Mechanicsville, Ashland, and Glen Allen, local weather conditions make these decisions especially important. Moisture, shade, and seasonal expansion can age exterior materials faster than many people expect.

A simple rule of thumb for when to act

If a board is soft, unstable, deeply cracked, pulling loose, or no longer draining properly, do not wait. If several boards show the same problems, it is time to look at the deck as a system, not just a few isolated defects.

A well-built deck should feel solid, safe, and ready to use without second-guessing where you step. If yours no longer feels that way, that is usually your clearest answer. Taking care of worn deck boards early protects more than the deck itself – it protects how you use your home every day.

Permits for Home Additions: What to Expect

Permits for Home Additions: What to Expect

You can have the design picked out, the budget outlined, and a clear vision for the extra space your family needs, but permits for home additions still have the power to slow a project down if they are treated like an afterthought. For homeowners in the Richmond area, permitting is not just paperwork. It is the process that helps confirm your addition is safe, code-compliant, and properly reviewed before work moves forward.

That can sound intimidating, especially if this is your first major renovation. The good news is that permits are manageable when they are handled early and correctly. The bigger risk is assuming a room addition, sunroom, expanded kitchen, enclosed porch, or accessibility upgrade is too minor to require approval.

Why permits for home additions matter

A home addition changes more than your square footage. It can affect structural loads, electrical systems, plumbing lines, HVAC capacity, setbacks, drainage, and how your property complies with local zoning rules. Permits exist to make sure those changes are reviewed before they become expensive problems.

For homeowners, that matters in practical ways. A properly permitted project protects your investment, helps reduce safety concerns, and can make future resale smoother. If a past addition was built without approval, that issue can surface later during an appraisal, insurance claim, or home sale.

Permits also create accountability. Plans are reviewed, inspections are scheduled, and the work is expected to meet current code. That may feel like one more layer of process, but it is usually far better than discovering after the fact that framing, wiring, or foundation work needs to be opened back up and corrected.

What kind of addition usually needs a permit?

In most cases, if you are increasing livable space or changing the structure of the home, a permit is likely required. That often includes room additions, second-story expansions, bump-outs, enclosed patios, sunrooms, garage conversions, and larger accessibility modifications.

Even projects that seem straightforward can trigger permit requirements. Adding a bathroom to a new addition involves plumbing and electrical work. Expanding a kitchen may require framing changes, new circuits, and updated ventilation. A sunroom may involve foundation work, roofing tie-ins, and energy code considerations.

There are also times when homeowners confuse cosmetic work with structural work. Painting, flooring, and cabinet replacement may not require the same level of review, but once walls move, load paths change, or systems are extended, the conversation shifts quickly.

The permits process is not the same everywhere

This is where homeowners often get tripped up. Permits for home additions are handled locally, not with one universal rulebook for every project. In and around Richmond, the exact process can vary depending on whether the property is located in the City of Richmond, Henrico, Hanover, Chesterfield, or another nearby jurisdiction.

Each locality may have its own application steps, timelines, review standards, and inspection procedures. Setback requirements, lot coverage limits, and zoning conditions can differ as well. A plan that works on one property may need revisions on another simply because the parcel is shaped differently or local rules are more restrictive.

That is why local experience matters. A contractor who regularly works in the area can often spot likely approval issues early, before they become redesign costs or scheduling delays.

Zoning comes before construction approval

Many homeowners think permits are only about building code, but zoning is often the first hurdle. Before an addition is approved, the locality may review where that new space sits on the lot and whether it meets setback and land-use rules.

For example, a family room addition on the back of the house may look simple on paper, but if it extends too close to a property line or pushes lot coverage beyond what is allowed, the project may need changes before permits can be issued. Corner lots, older neighborhoods, easements, and HOA requirements can add more complexity.

This does not always mean the project is impossible. It may mean the footprint needs adjustment, the design needs refinement, or additional approvals are required. The earlier those issues are addressed, the easier it is to keep the project moving.

What homeowners should expect during plan review

Most additions require more than a basic sketch. Local departments typically want drawings that show dimensions, structural details, layout changes, and how the addition connects to the existing house. Depending on the scope, plans may also need to address electrical, mechanical, plumbing, and energy code items.

Once submitted, those plans are reviewed by the appropriate departments. If reviewers have questions, they may issue comments that need to be answered before approval. This is a normal part of the process, not a sign that something has gone wrong.

The timeline can vary. Some permits move faster than others, especially when the scope is clear and the plans are complete. More complex projects, or those involving zoning questions, engineering, or multiple trade reviews, can take longer. Homeowners are often most frustrated when they expect construction to start immediately after design, only to learn there is still an approval phase ahead.

Inspections are part of the job, not a setback

After permits are issued and construction begins, inspections typically happen at key stages. That might include footing or foundation inspection, framing inspection, rough-in inspections for plumbing and electrical, insulation review, and final approval.

These checkpoints are there to verify the work matches the approved plans and current code. In a well-managed project, inspections are built into the schedule from the start. They are not random interruptions. They are one of the reasons a properly run addition stays on track and avoids larger problems later.

There can still be delays. Inspectors may request corrections, weather can affect timing, and busy local departments can create scheduling bottlenecks. A realistic contractor will account for that instead of promising an unrealistically fast timeline.

The cost of skipping permits is usually higher later

Some homeowners are tempted to bypass permits because they want to save time or avoid fees. That decision can create much bigger costs down the road.

Unpermitted work can lead to stop-work orders, fines, forced removal, failed inspections, and expensive corrections. If the addition includes electrical or plumbing work that was not reviewed, the safety risks are not theoretical. They are real. Insurance coverage can also become complicated if there is a claim involving unapproved construction.

Then there is resale. Buyers are more cautious than they used to be, and many ask direct questions about additions and renovations. If square footage was added without approval, that can affect negotiations, appraisals, and buyer confidence.

How a good contractor helps with permits for home additions

A dependable contractor does more than build the space. They help organize the process so the homeowner is not left trying to interpret local requirements alone. That may include coordinating plans, identifying likely zoning concerns, preparing permit submissions, scheduling inspections, and communicating what approvals are still pending.

That support matters because permitting is tied to budget and schedule. If plans are incomplete, if structural needs were underestimated, or if approvals were not accounted for early, those issues usually show up as delays and change orders. Clear planning protects the project.

For homeowners, the best approach is to ask direct questions before work begins. Who is pulling the permit? What drawings are required? Has the contractor handled similar additions in your locality before? What happens if the plan reviewer requests revisions? Straight answers at the front end usually mean fewer surprises later.

Old Dominion Innovations works with homeowners who want that kind of steady, hands-on guidance, especially on projects where added space needs to feel natural, functional, and built to last.

A realistic timeline starts with realistic expectations

One of the most common misunderstandings is assuming the permit is the project. It is not. It is one part of a larger sequence that includes consultation, design, approvals, material selections, construction, inspections, and final completion.

Some additions move forward relatively smoothly. Others take more coordination because of lot constraints, structural complexity, or local review comments. Neither situation is unusual. What matters is having a plan that respects the process instead of trying to rush around it.

If you are thinking about adding living space to your home, treat permitting as part of protecting the value of the finished work, not as a box to check. The right addition should give your family more room and more confidence in how that space was built.

Are Sunrooms Worth It for Richmond Homes?

Are Sunrooms Worth It for Richmond Homes?

A lot of home upgrades sound great when you first picture them. A sunroom is one of those projects that can feel easy to say yes to – more light, more living space, better views of the yard. But once you start thinking about cost, heating and cooling, and whether you will truly use it year-round, the real question becomes more practical: are sunrooms worth it?

For many Richmond-area homeowners, the answer is yes – but not automatically. A sunroom can be a smart investment when it fits the way your family actually lives, the layout of your home, and the level of comfort you expect in every season. It can also be the wrong project if you want extra square footage but are really better served by a full addition, deck upgrade, or another type of renovation.

Are Sunrooms Worth It? It Depends on How You Will Use One

The biggest factor is not the idea of a sunroom. It is the day-to-day reality of it.

If you want a bright place to drink coffee in the morning, read in the afternoon, entertain guests, or give kids a flexible play area without being shut indoors, a sunroom can deliver a lot of value. It adds usable space without the complexity of some full-scale additions, and it creates a part of the home that feels different from the rest of the house in a very good way.

That said, not every homeowner needs a sunroom. If your family already spends most of its time in an open kitchen, family room, or covered outdoor area, a sunroom may become a nice-looking extra that does not get much real use. Worth comes from function, not just appearance.

A good contractor will usually ask a simple question early on: what do you want this room to do? That answer matters more than trends or resale guesses.

What Makes a Sunroom Valuable

A well-designed sunroom can improve both livability and enjoyment. That matters because most homeowners are not renovating only for resale. They are renovating to make home work better now.

Natural light is one of the biggest advantages. Homes can feel more open and more inviting when there is a dedicated space that brings in daylight and outdoor views. In many cases, a sunroom becomes the room people naturally drift toward. It feels relaxed, comfortable, and separate without being disconnected.

There is also the flexibility factor. A sunroom can serve as a casual sitting room, hobby space, breakfast area, home office, or place to host family without crowding your main living spaces. For households that want more breathing room but do not need a full second story or major footprint expansion, that flexibility can be a very practical win.

For homeowners in places like Richmond, Henrico, Hanover, and Glen Allen, a sunroom can also help bridge the gap between indoor comfort and outdoor living. You get the benefit of the view and the light without dealing with bugs, sudden weather changes, or Virginia humidity the way you would on an open deck or patio.

When a Sunroom Is Worth the Cost

Sunrooms tend to be worth it when they solve a real problem.

Maybe your home feels closed off and dark. Maybe you need extra family space but do not want the cost and disruption of a large addition. Maybe your backyard is beautiful, but you only enjoy it a few months out of the year. In those cases, a sunroom is doing more than adding square footage. It is improving the way you use your home.

They are also often worthwhile for homeowners who plan to stay put. If this is your long-term home, the return is not only measured in resale. It is measured in years of daily enjoyment, better flow, and a home that fits your life more comfortably.

Cost matters, of course. A sunroom is a significant project, and quality construction matters. Cheap materials, poor insulation, or weak integration with the existing home can turn a promising project into a space that is too hot in summer, too cold in winter, or simply feels tacked on. That is usually where regret starts.

When the design, materials, and installation are handled properly, a sunroom has a much better chance of feeling like a true extension of the home rather than an afterthought.

When a Sunroom May Not Be Worth It

There are situations where a sunroom is probably not the best use of your budget.

If your main goal is maximum resale value in the shortest possible timeline, a sunroom may not be the most direct answer. Buyers may love it, but resale returns can vary based on quality, square footage, neighborhood expectations, and whether the room is heated and cooled like the rest of the home.

If you need fully conditioned living space for everyday use, a traditional addition may make more sense. A sunroom can be highly comfortable, but not every sunroom is designed to function exactly like a standard interior room. That difference should be discussed clearly before the project starts.

A sunroom may also fall short if your property layout is not ideal. Awkward access, poor orientation to the sun, drainage challenges, or a backyard that lacks privacy can all affect the final result. Sometimes another project, such as a screened porch, covered patio, or reworked deck, will better match the house and your goals.

This is why planning matters so much. The question is not just whether sunrooms are worth it in general. It is whether this sunroom, on this home, for this family, is the right fit.

Comfort Matters More Than People Expect

One of the biggest make-or-break issues is comfort.

Homeowners often fall in love with the look of a sunroom before thinking through how it will feel in July or January. In Virginia, that matters. A beautiful room with too much heat gain or poor temperature control can end up being used far less than expected.

The right glass, insulation, ventilation, shading, and HVAC approach all shape whether the room feels pleasant across the seasons. This is one reason consultation-led planning is so important. The best outcome usually comes from balancing appearance with real-life performance.

A sunroom should not just photograph well. It should be a place where you genuinely want to sit on a humid afternoon or a chilly morning.

Are Sunrooms Worth It for Resale?

They can help, but this should not be your only reason.

Buyers often respond well to bright, attractive bonus spaces. A sunroom can make a home feel larger, more versatile, and more appealing. It may also help your property stand out in a competitive market, especially if the room feels polished and well integrated with the rest of the house.

Still, resale is rarely a straight-line formula. Not every buyer assigns the same value to a sunroom, and not every project returns the same percentage of its cost. Features like energy efficiency, year-round usability, and overall craftsmanship will influence how much value others see in it.

The safer mindset is this: treat resale as a benefit, not the whole justification. If you will enjoy the room for years and it also strengthens your home’s appeal, that is a much more dependable way to think about value.

How to Tell if a Sunroom Is Right for Your Home

A worthwhile sunroom usually checks a few practical boxes. It fits the style of your house, connects naturally to the existing layout, and serves a purpose your family already knows it needs. It should also be built with materials and systems that support comfort, durability, and easy maintenance.

Budget should be part of the conversation from the start. A realistic plan helps avoid cutting corners on the very features that make the room enjoyable. It also lets you compare the sunroom against other options honestly. In some homes, a sunroom is the clear winner. In others, a different renovation will create more value.

That is where working with an experienced remodeling contractor helps. A good partner will not push one solution for every house. They will look at how you live, how your home is built, and what kind of result you actually want. For homeowners across the Richmond area, that kind of straight, practical guidance often makes the difference between a project that looks good on paper and one that truly improves everyday life.

If you keep coming back to the idea of a brighter, more comfortable place to gather, relax, and enjoy your home in a new way, a sunroom may be worth far more than the numbers alone suggest. The best home improvements are not just the ones that add space. They are the ones that make home feel better every single day.

How Long Bathroom Remodel Takes

How Long Bathroom Remodel Takes

If you are trying to plan around school schedules, workdays, or having only one full bath in the house, one question matters fast: how long bathroom remodel takes. The honest answer is that most bathroom remodels take anywhere from 2 to 6 weeks for construction, but the full process can stretch longer once planning, material ordering, and inspections are part of the picture.

That range may sound broad, but there is a reason for it. A simple cosmetic update moves much faster than a remodel that changes plumbing locations, replaces a tub with a walk-in shower, or includes custom tile work. The size of the bathroom matters, but the scope of the work matters more.

How long does a bathroom remodel take in real life?

For many homeowners, the construction phase of a standard hall bath or primary bathroom remodel falls in the 3 to 5 week range. That usually includes demolition, rough plumbing and electrical work, inspections when required, drywall or backer board installation, tile work, fixture installation, painting, and punch-list items.

A smaller cosmetic refresh may take closer to 1 to 2 weeks. That kind of job might involve replacing the vanity, toilet, mirror, lighting, and flooring without moving walls or rerouting plumbing. On the other hand, a larger or more customized remodel can easily take 6 to 8 weeks, especially if specialty materials, structural changes, or accessibility modifications are involved.

The part many homeowners do not expect is that the calendar starts before demolition. Design decisions, product selections, permits, and lead times often add several weeks before any work begins in the bathroom itself.

The typical bathroom remodel timeline

Planning and selections

This stage can take a few days or several weeks depending on how quickly decisions are made. If you already know the layout, style, and budget, things move faster. If you are still comparing vanities, tile patterns, plumbing fixtures, and lighting, the schedule naturally stretches.

This is also the point where experienced contractors help prevent costly slowdowns later. Choosing materials early and confirming measurements before ordering can save a lot of frustration once the project is underway.

Permits and scheduling

If permits are needed, that can add time before the start date. Not every bathroom project requires the same level of permitting, but work involving plumbing, electrical, layout changes, or structural updates often does. Inspection timing can also affect the sequence of work.

In the Richmond area, permit timelines can vary by locality, so it helps to work with a contractor who understands the process and plans for it instead of treating it like a surprise.

Demolition

Demolition usually moves quickly. In many bathrooms, this phase takes 1 to 2 days. Even so, demolition can uncover hidden issues such as water damage, subfloor problems, outdated wiring, or plumbing repairs that were not visible at the estimate stage.

This is one reason realistic timelines matter. A bathroom may look straightforward on the surface, but once walls and floors are opened, the house tells the full story.

Rough-in work

After demo, plumbing and electrical rough-ins are completed. If fixtures are staying in the same place, this part is usually faster. If the shower, toilet, or vanity is moving, the work becomes more involved.

This phase often takes a few days, then inspections may be required before the walls are closed up. Inspection windows can create pauses that are normal, even if the room looks temporarily inactive.

Walls, floors, and tile

This is where many bathroom remodels slow down, not because something is wrong, but because detail work takes time. Backer board, waterproofing, tile layout, tile setting, grout curing, and floor installation all require careful sequencing.

Custom showers especially add time. Niches, benches, large-format tile, decorative patterns, and glass installation all raise the labor involved. A bathroom with basic prefabricated materials usually finishes faster than one with high-end tile work and custom finishes.

Fixture and finish installation

Once the surfaces are complete, the vanity, toilet, faucet, lighting, trim, mirrors, shower fixtures, and accessories go in. This phase can move quickly when materials are on site and no corrections are needed.

The final stretch often includes touch-up paint, minor adjustments, cleanup, and a walkthrough to address punch-list items. These details matter because they are what turn a construction zone back into a usable room.

What affects how long bathroom remodel takes?

The biggest factor is scope. A bathroom that keeps the same footprint and replaces finishes is a very different project from one that removes a tub, expands a shower, and updates old plumbing lines.

Material availability is another major factor. Stock vanities and standard fixtures are often easier to schedule around than custom cabinetry, specialty tile, or made-to-order glass enclosures. One delayed component can hold up multiple trades.

The age of the home matters too. In older homes, it is more common to run into uneven floors, water damage, venting issues, outdated electrical, or framing that needs correction before new finishes can go in. None of that is unusual, but it does affect the timeline.

Decision speed plays a role as well. If product choices are still being made after demolition begins, delays become more likely. Good remodeling teams try to lock in as many decisions as possible before work starts for exactly this reason.

Then there is the question of customization. Accessibility improvements, curbless showers, grab bars with proper blocking, widened doorways, or comfort-focused layout changes can be excellent long-term investments, but they often require more planning and more precise construction.

Why some bathroom remodels run longer than expected

Most delays come from a small handful of causes. Hidden damage is one. Once an old tub or tile floor comes out, repairs may be needed before the new work can continue.

Inspections can add waiting time, especially when schedules are tight. Material delays are another common issue, particularly with custom or backordered products. And sometimes the timeline expands because the homeowner decides to add work mid-project, like replacing the bathroom door, upgrading adjacent flooring, or changing fixture selections after installation has already been scheduled.

That does not mean the project is off track. It usually means the contractor is working through real conditions instead of forcing a rushed finish that could create bigger problems later.

How to keep your bathroom remodel on schedule

The best way to protect the timeline is to make selections early. Have the vanity, tile, plumbing fixtures, lighting, paint colors, and accessories chosen before demolition begins whenever possible.

It also helps to be clear about priorities. If speed matters most, stock materials and simpler finishes may make more sense than custom-built components with long lead times. If design details matter most, it is worth planning for a longer schedule rather than expecting a highly customized bathroom in a basic turnaround window.

Communication is just as important. A dependable contractor should explain the sequence of work, identify likely pressure points, and let you know where the schedule has flexibility and where it does not. That kind of planning reduces stress because you know what is happening and why.

For households with only one main bathroom, temporary arrangements should be discussed before work starts. In some cases, phasing the work or coordinating around family routines can make the disruption easier to manage.

A realistic timeline is better than a fast promise

Homeowners understandably want a quick answer, but the better question is not just how long bathroom remodel takes. It is how long your bathroom remodel should take to be done properly.

A rushed project can lead to poor waterproofing, sloppy tile work, fixture issues, and callbacks that cost more time than they save. Careful scheduling, solid craftsmanship, and honest communication usually produce a better result than an overly aggressive deadline.

For Richmond-area homeowners, that is often the difference between a remodel that feels chaotic and one that feels managed. A trusted contractor should help you understand the timeline before work begins, account for real-world variables, and keep the job moving with as little disruption as possible. Old Dominion Innovations takes that hands-on approach because homeowners deserve clear expectations as much as they deserve a finished bathroom that looks good and works well every day.

If you are planning a bathroom remodel, give yourself enough room for decisions, ordering, and the unexpected. A well-built bathroom is part of your daily life for years, so it is worth doing on a timeline that respects both your home and your investment.